Troopy Build Series: Sound Deadening and Insulation
78-Series Sound Proofing
Sound deadening and proofing are essential to any overland, 4×4 vehicle or campervan build because they assist with improving comfort and reducing fatigue, through reduced road noise for travellers, especially over longer distances seen on expeditions.
Sound insulation can also help to improve the thermal performance of a camper setup because soundproofing shares many similar properties to thermal insulation.
Road Noise and Road Safety
Cab noise is a significant contributor to fatigue, especially for the driver, I would go so far as to argue that reducing noise has a tangible impact on road safety, in that accidents from driver fatigue are commonplace.
Curious about my own experience, I found a study by the National Library of Medicine, titled “The Effect of Low-Frequency Road Noise on Driver Sleepiness and Performance“, which states “The results suggest that low-frequency noise contributes to increased driver fatigue and reduced task performance“
70-Series Sound Proofing
- 78-Series Sound Proofing
- Troopy Build Series
- Why Soundproof a Troopy, 4×4 or even a Land Rover Defender?
- Choosing the Right Sound-Deadening Materials
- Soundproofing Your Troopy: A Step-by-Step Guide
- Sound Deadening a LandCruiser Troopy Video
- The Results & Conclusion: A Quieter and More Comfortable Ride
- Sound Proofing – Frequently Asked Questions
Troopy Build Series
This post is part of the Troopy Build Series, where we document how we have built our 78-Series Toyota LandCruiser into an Overlanding Camper. Our 4wd Campervan.
In this post, we explore why we are installing sound deadening and insulation in the Troopy Camper build, what (Car Builders) we chose to install and how we went about the DIY soundproofing installation.
Why Soundproof a Troopy, 4×4 or even a Land Rover Defender?
Before you ask, then click away. Including mention of a Land Rover Defender in this article is valid, because not only does this content relate to them, but we also have had the same experience with preparing our previous European overland vehicle a Land Rover 300TDI years ago with sound deadening to reduce road noise and fatigue. The principles are the same, and the reasons are equally so.
Benefits of Soundproofing Overland Vehicles
The benefits of sound deadening any vehicle, be it a 4WD, campervan or equally the Troopy are that once installed:
- The overall comfort of the vehicle will be improved in all road conditions including off-road, where corrugations are the main sources of low-frequency excitation of panels. Sound Deadening with Butyl mats is the key defence here.
- Another source of significant noise is the wheel arches from stones and rocks hitting these large surfaces. In a vehicle which has not been deadened, this can be an excruciating experience.
- Long journeys and extended time on the road – Because the ambient noise is reduced, it is much easier to drive for extended periods, which can often be required in overlanding.
- Enhanced comfort and enjoyment of music/conversation – A major benefit is that you can now hear your tunes!
- Reduced driver fatigue – Improves road safety and awareness.
- Increased resale value – Installed correctly the value of your vehicle will not be impacted and may even improve buyer interest.
- Improved thermal performance, due to the density of the sound deadening and the insulating properties of the foil-backed soundproofing foam panels.
Choosing the Right Sound-Deadening Materials
In general, when improving the acoustic performance of any vehicle there are three key materials or products to consider. These address different sources of noise and combine to give a complete solution.
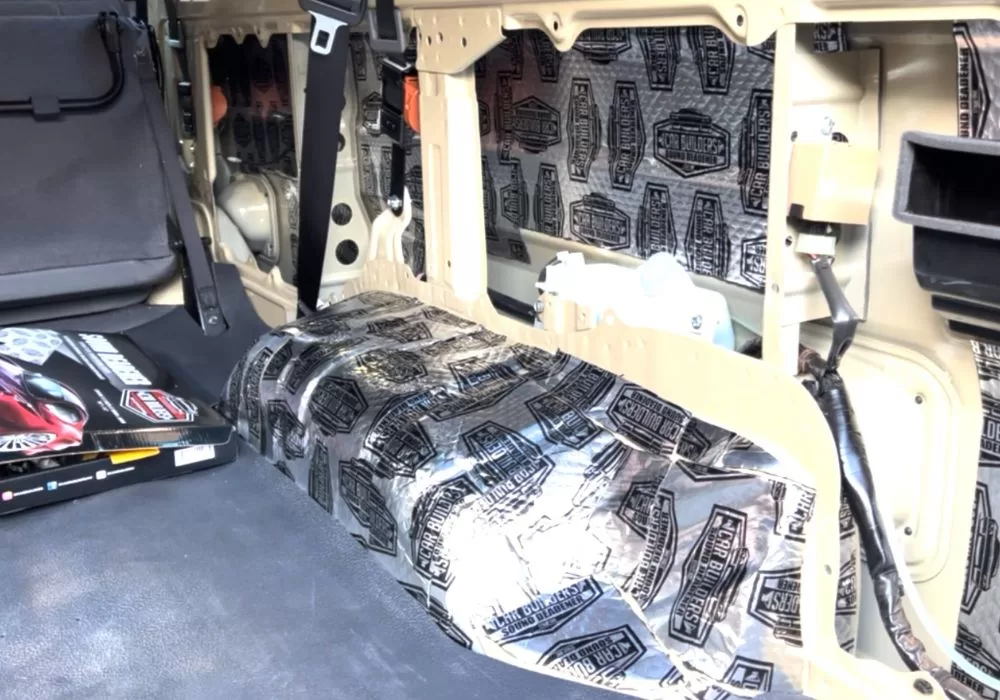
- Butyl Sound Deadening – This is a dense material designed to isolate panel resonances in the vehicle, such as the drumming experience on roof panels. Often referred to as stage 1, this should be the first step in improving any 4×4 or campervan.
- Mass-loaded vinyl (MLV) – is a closed-cell rubber product that is loaded with material that increases its mass and is extremely effective at damping noise from being transmitted by air from panels in the vehicle and complements sound deadening, which is why it is often referred to as Stage 2 soundproofing.
- Closed-cell foam – Closed-cell foam does not trap water, it is designed to absorb airborne noise and is also often backed by reflective foil to improve thermal performance. This product is normally used in situations where MLV cannot be used such as verticle and horizontal roof surfaces.
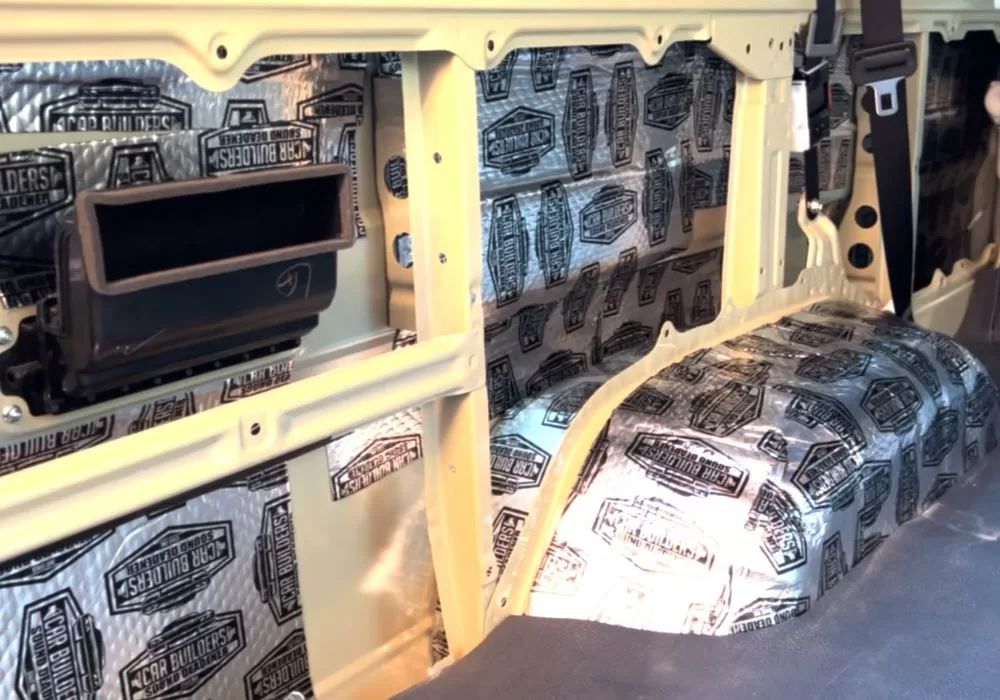
In our Troopy we are using a combination of products from Car Builders, their stage 1 sound deadening Butyl panels for direct application on the floors, walls, wheel arches and also the inside of the doors.
We are also using their stage 2 products, which is a mass-loaded vinyl product, which is pre-cut for the floor around the driver and passenger seats, on top of this we are replacing the original carpet, but without the original sound absorbing material supplied by Toyota.
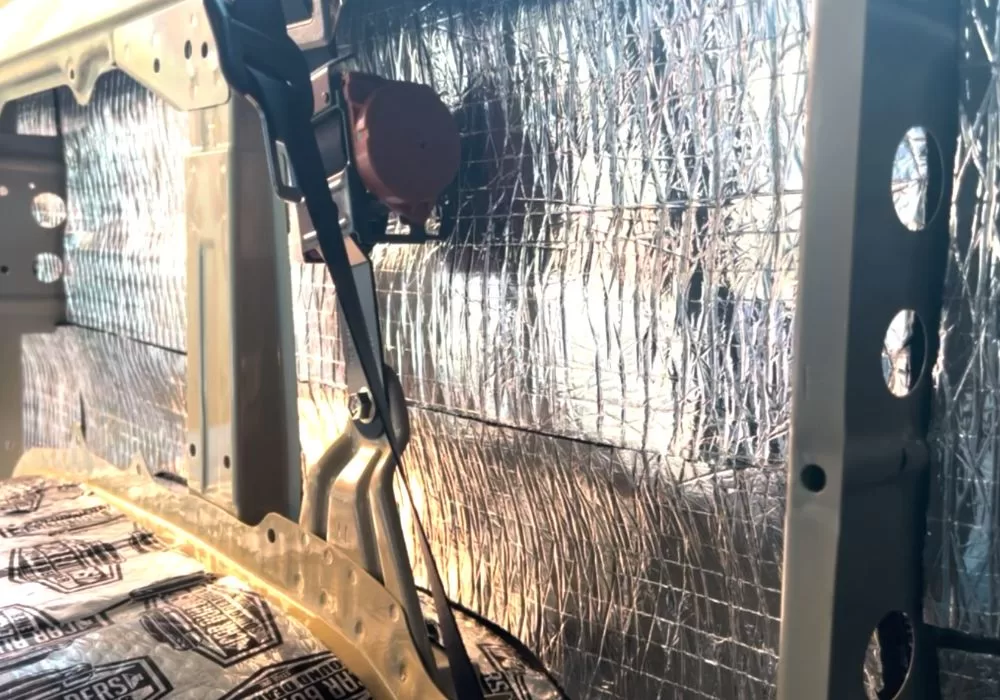
For the walls, doors and other quarter panels we are using the Stage 2 Van Liner, which is a 10mm peel-and-stick closed cell foam. This creates a radiant heat barrier and soft surface to reduce sound energy.
Soundproofing Your Troopy: A Step-by-Step Guide
The basic process for any strategy to reduce noise or insulate a vehicle regardless of whether it is a 4×4, Campervan or even a truck, is to first identify key areas that are the sources of noise and noise transmission before then working out the approach.
In our case, the Troopcarriers have large metal body panels that act as perfect transmission sources for vibration and noise. This is why we chose the approach of deadening and then insulating, to help isolate the noise. With the side benefit of improved thermal comfort.
Areas to watch out for on van-style vehicles, such as a Mercedes Sprinter or VW Transporter are the roof panels, the doors, the quarter panels and the floor. In our case, we did not need to worry about the roof because we cut the roof off to fit the Alu-Cab Hercules roof conversion, so in effect, the bed is the soundproofing. But we did do all the other surfaces mentioned.
Step 1 – Vehicle Strip and Preparation
The first part of the installation after ordering your product, is to strip the areas that need the application. By the way, you do not have to order stuff from Car Builders. Similar soundproofing products are available from Amazon and other places, just watch out for the quality and specs of the products. For example, I noticed that the deadening was much thinner in some cases on Amazon, so you will have to be careful about which item you choose.
Also, make sure that the foam panels you buy are closed-cell so that they do not hold water. In the end, we went with the Car Builders products because they were set up as a kit and cut to size and we also had a hefty Car Builders discount, which in the end made the cost similar to comparable products!
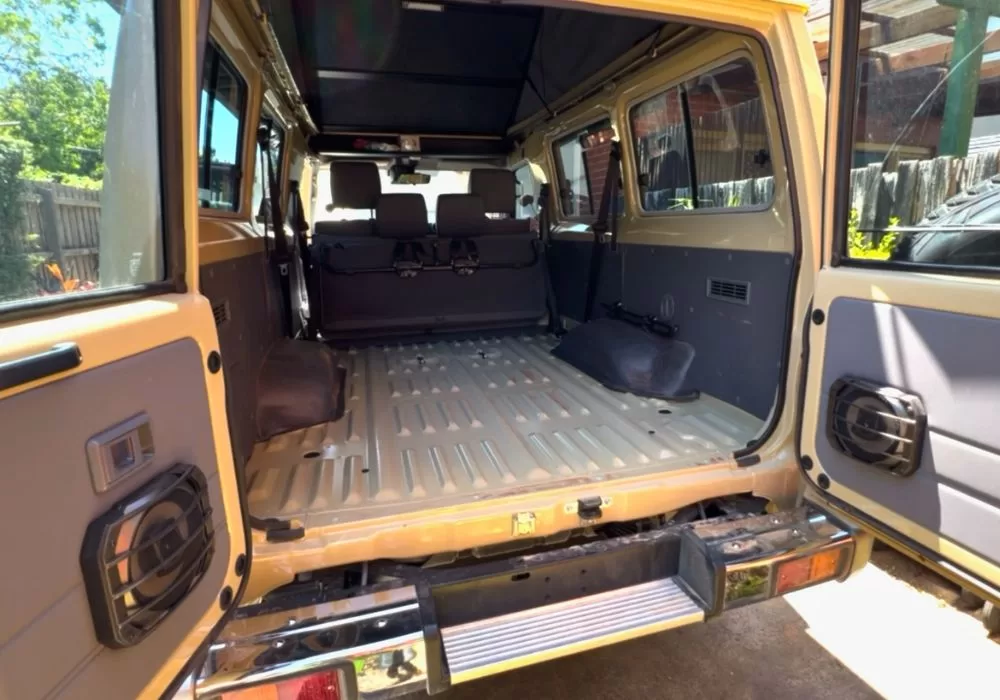
This meant that for the Troopy we needed the rear boot liner, wheel arch covers, wall trim panels, front and rear seats and all the door cards removed before we started. Highly suggest that you prepare yourself with a trim removal tool to make it much less likely that you damage the panels. Removing the seats simply needs a 14mm socket.
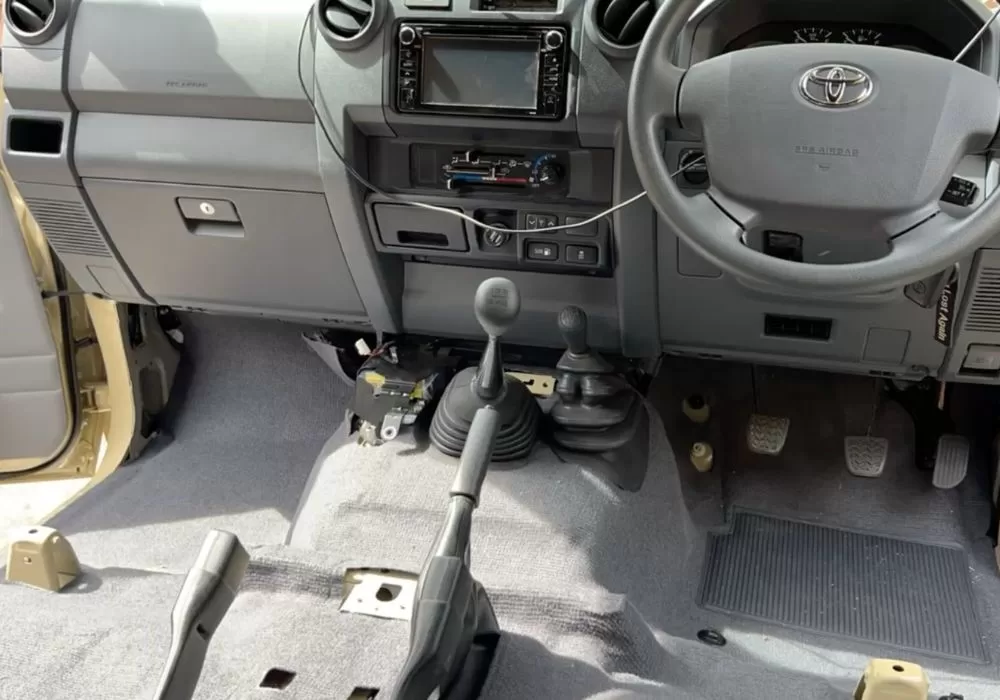
After removing the front seats, it is necessary to remove the trim on the edge of the floor near the door and also the sidekick panels, for example, the panel that covers the fuses. Next, you will need to remove the centre console, taking care not to disturb the electronics near the cup holder.
Once these are all out it should be possible to remove the carpet, which will require manoeuvring around the gear leavers.
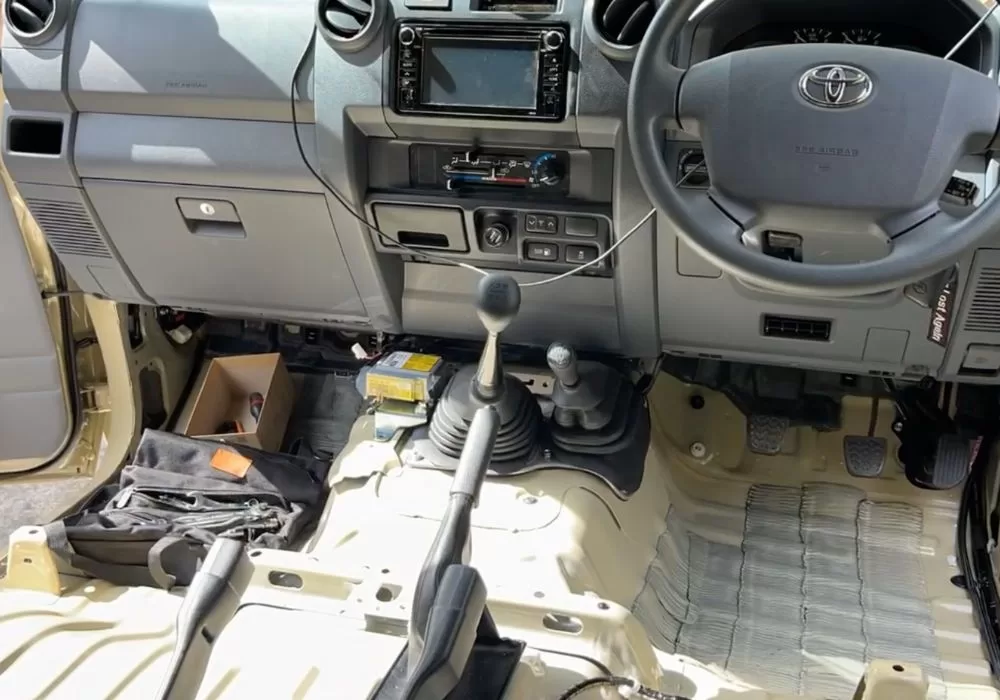
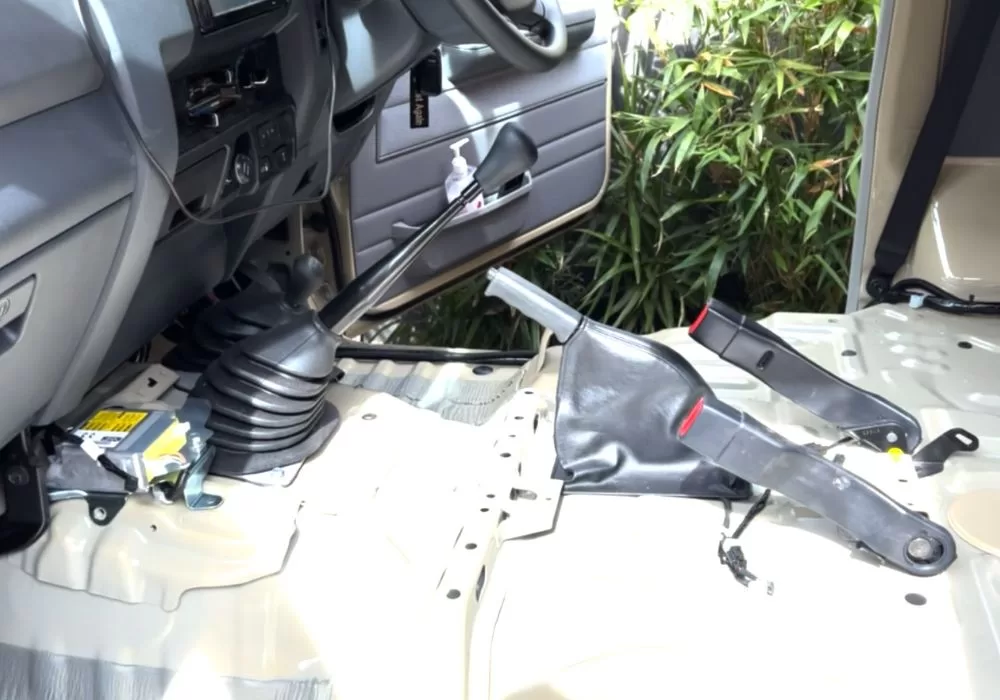
Once the interior is exposed, prior to installing any self-adhesive butyl sound deadening or insulation, it is essential to ensure the interior and panels are clean of any dirt, sand oil etc. Some of the panels, like the door skins could have some rust prevention applied like waxol or similar. If this is the case you will need to ensure the panels are completely clean, otherwise the sound products will not stick. We used car body grease and oil cleaner.
Step 2 – Sound Deadening Install
With the car prepped, it is time to start installing the sound deadening. It might seem overwhelming at first with the amount of area to be covered with sound-deadening sheets.
We’d suggest starting small and breaking the job down over whatever periods you have. So for example:
- Wheel arches
- Quarter Panels
- Rear Cargo area floor
- Front floor pans and firewall
- Gearbox tunnel
- Front doors
- Rear doors
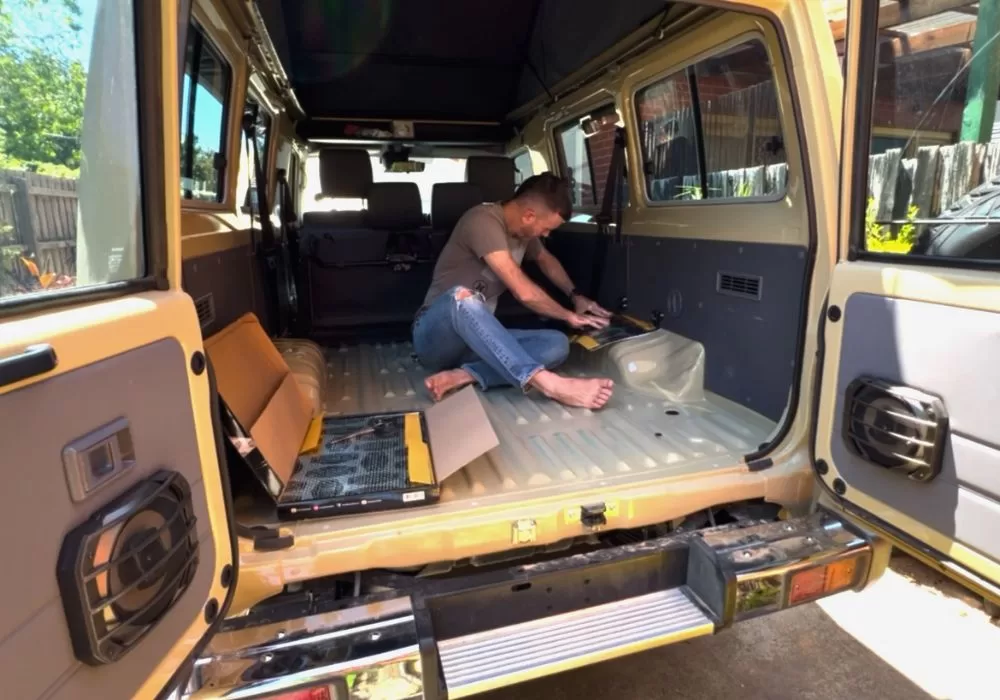
The process in total takes about half a day, but we worked on it in bite-size chunks over a few days.
With the doors, the space is a bit awkward to get into. We cut the strips of deadening into smaller sections. It is not necessary to completely cover every surface with stage 1 deadening.
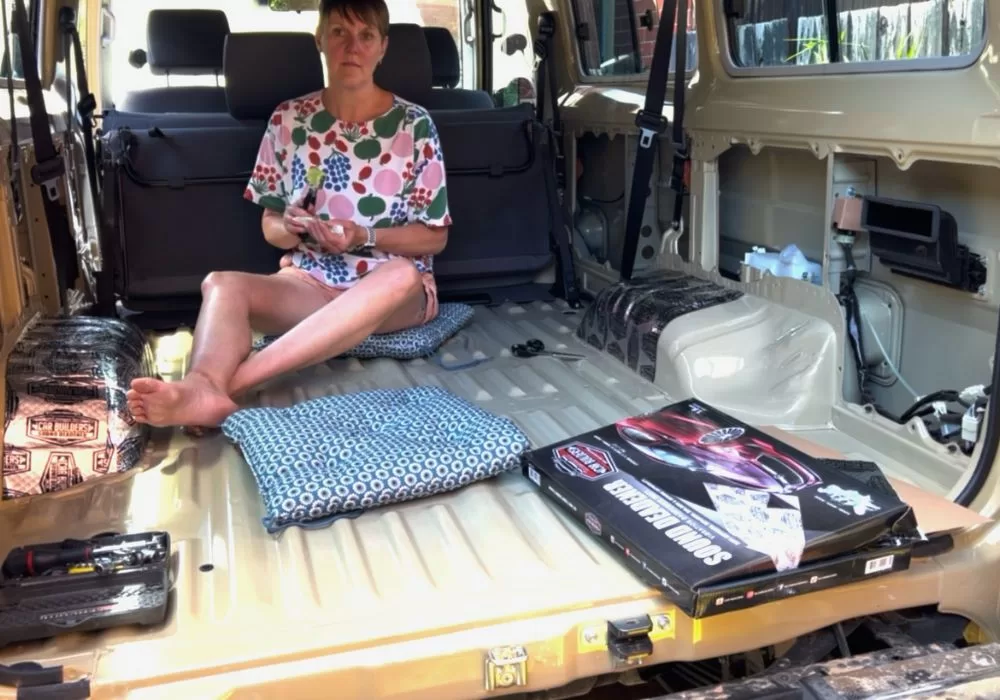

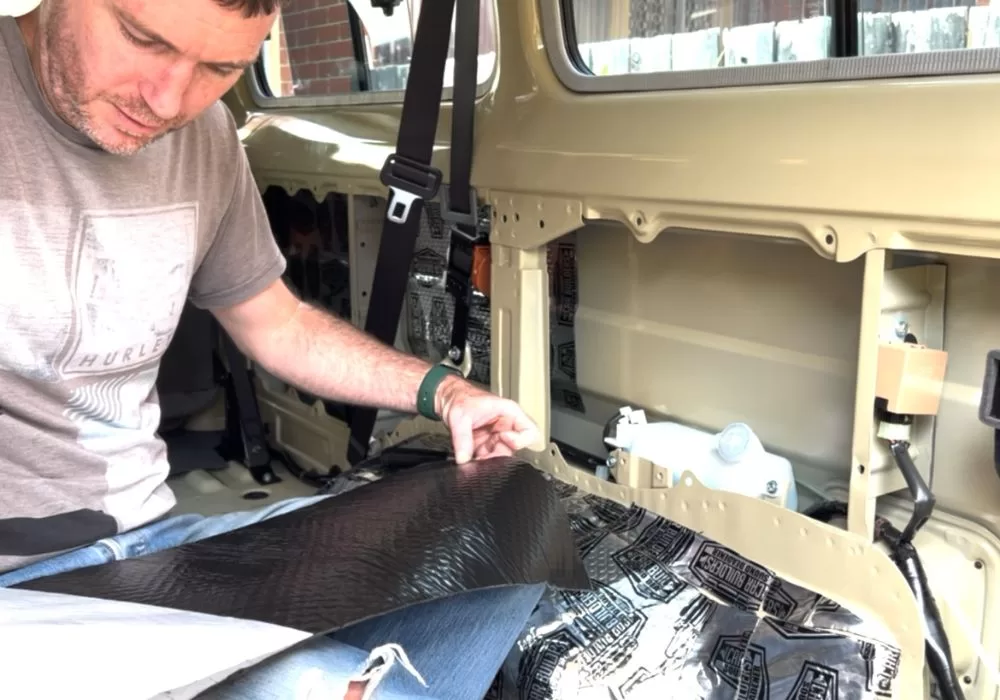
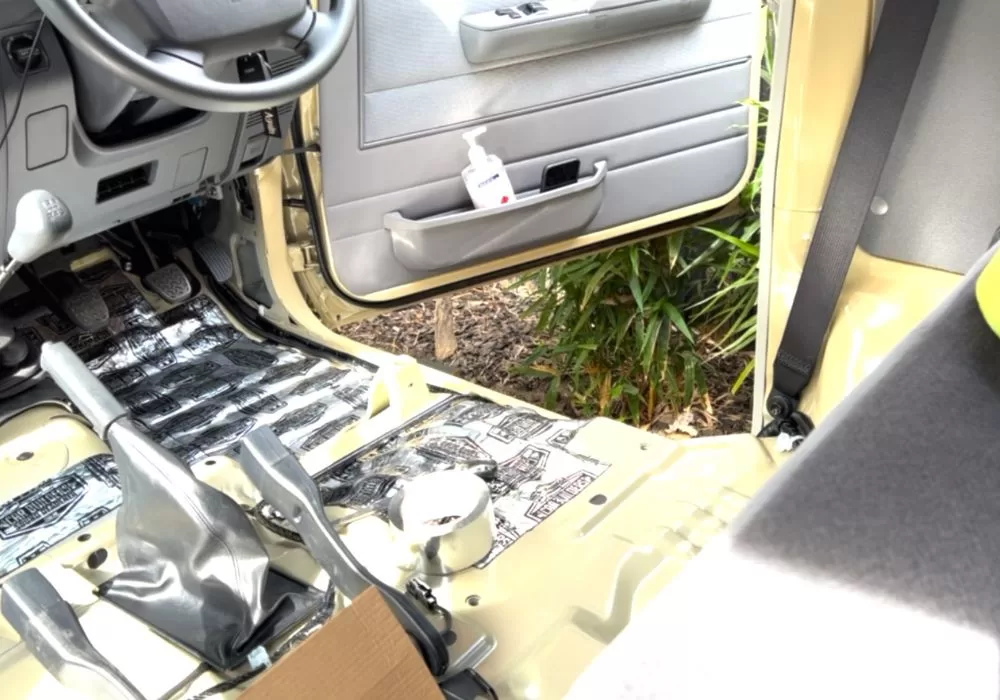

Before and After Stage 1 Comparison
If you want to hear the difference that Butyl panels make on the panel resonances, check out this video from our Getting Lost Again Instagram.
Step 3 – Install Sound and Thermal Insulation aka Stage 2
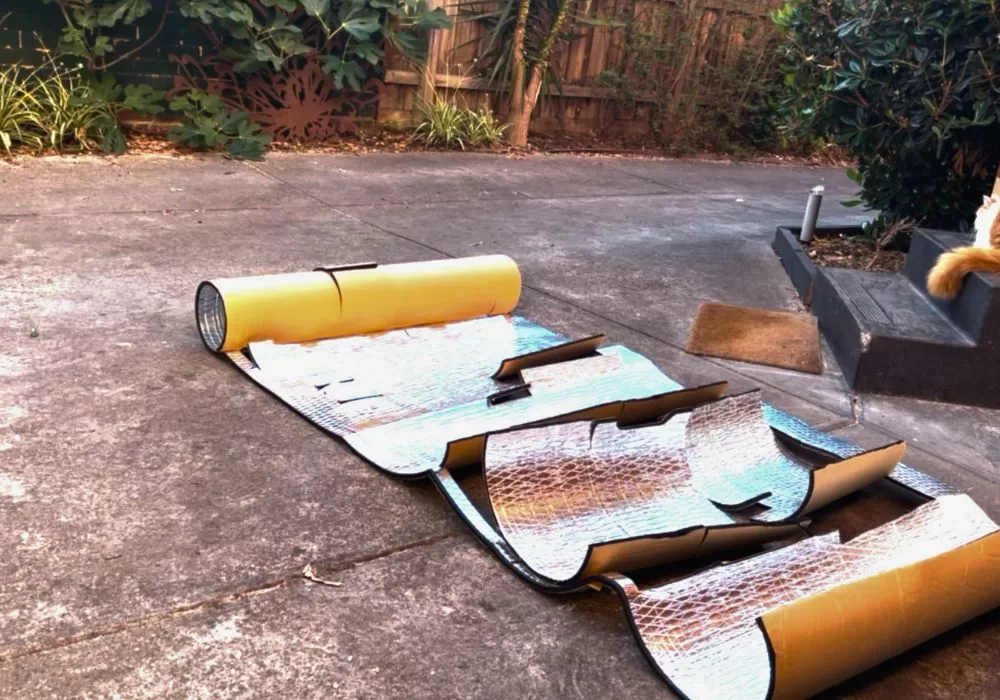
The next stage of the process is to install the foil-backed closed-cell insulation foam into the walls, doors and any areas you think are necessary. We installed this in the ridges of the cargo floor too, mainly because we had leftover material.
Step 4 – Mass Loaded Vinyl Install
The final stage before returning the carpet, is to fit the mass-loaded vinyl (MLV), this is part of stage 2 in Car Builders “speak”.
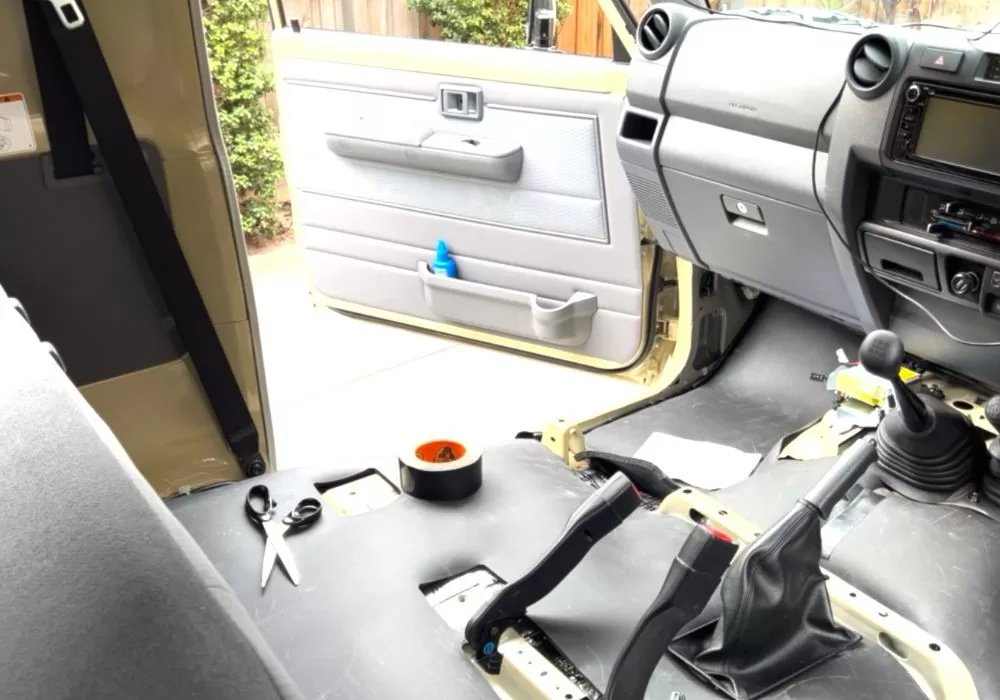
The MLV from Car Builders for the 78-Series and 75-Series Troopcarriers kits are precut to fit the drivers and passengers’ footwell and under the seats. This makes it very easy to fit.
You will need to remove some of the foam backing on the MLV edges, to allow overlapping and also use some heavy black gorilla duct tape to hold the joins together.
Step 5 – Original Carpet Install
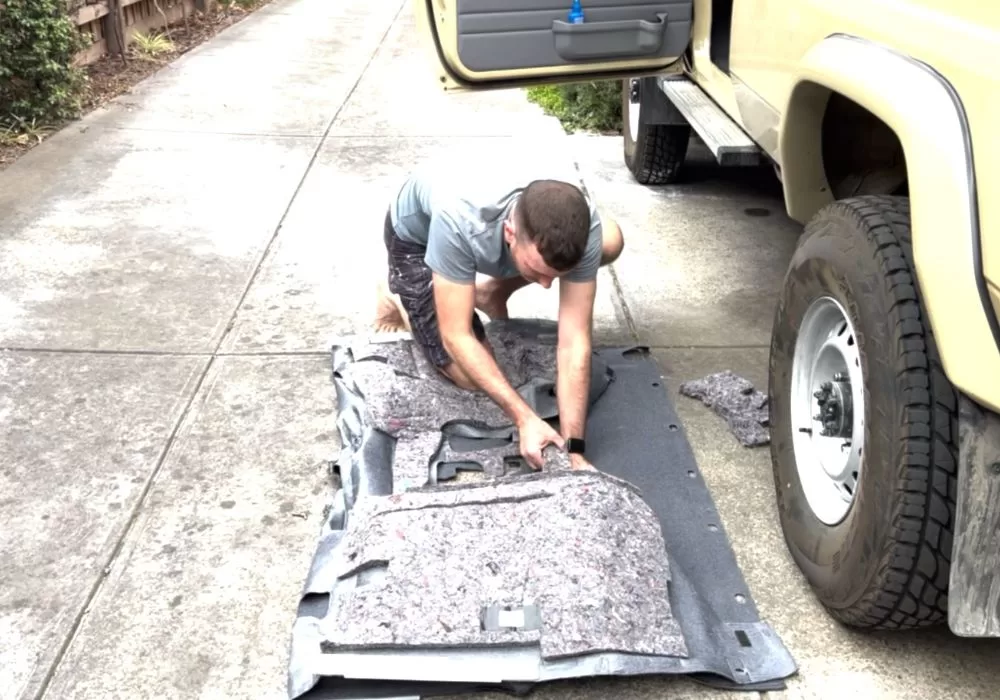
The last step is to remove the original jute material from the back of the stock cruiser carpets.
The MLV is fairly thick around 12mm, so it adds significant material under the carpets, and removing the jute backing is necessary to make sure that the fit is good when the carpet is fitted back.
Sound Deadening a LandCruiser Troopy Video
Car Builders put together this handy video, which covers the general installation process for a Troopy. Check it out and give them a like!
The Results & Conclusion: A Quieter and More Comfortable Ride
As projects go on a camper build, this is one of the easier ones, when it comes to required skills, the difficulty only comes from the volume of work required to do the task. If you are looking for an activity you can do on your own Troopy setup, then I’d personally suggest you consider this as a DIY activity.
We did not record any quantitative data on the improvements before and after installing the soundproofing, but we can say that there is a definite improvement in general drive comfort, for instance, you will immediately notice that conversations are easier, as is listening to music. I notice that my fatigue is less when I arrive at a destination.
Apart from this, check out the before and after video, which shows that soundproofing is worth it, by the change in resonance of the door panels.
If you need a firm recommendation, just do it whilst you can before you do your complete rear setup install.
Sound Proofing – Frequently Asked Questions
What is the best material for soundproofing a van?
There are two stages to soundproofing, the best materials are butyl panels followed by closed-cell mass-loaded vinyl.
How much does it cost to soundproof a campervan?
The material to soundproof a campervan conversion is between AUD $1000 and $2000. If you are going to have this installed professionally it will cost you considerably more because of the labour element, I was quoted $2k.
How to soundproof a van floor?
Follow the step-by-step soundproofing process in the article
How to stop rattles in a campervan?
Rattles come from items vibrating together, you have to either isolate or eliminate these. On items you install ensure that they are installed correctly so that they cannot rattle. Often cables that are installed by DIYers rattle, we suggest using cable ties and p-clips to secure. I also wrap cable in fleece tape to prevent rattles and chuffing.
Is sound deadening worth it?
Yes, absolutely.
How to soundproof van doors?
Remove the door cards, pull back the water shield and then first fit sound deadening followed by soundproofing closed cell insulation. Ensure the door panel is free from grease first.

Dan’s a windsurfing, adventure-seeking nomad with a passion for exploring the globe overland and an Engineer. Having grown up in the Middle East, he brings a unique perspective to Getting Lost Again, sharing his love for discovering hidden gems and embracing the unexpected. When he’s not on the road, he finds inspiration in windsurfing and other creative pursuits – and is equally at home under a vehicle solving problems as he is exploring a new place.
