How to Install and Test CB Radio – Land Rover Defender
Why do we need a CB Radio
I have been meaning to install a CB radio for several years, I finally got around to it this year. On the last few trips, we have found that we could have done with a CB to communicate with others in the group at various stages. It is not always possible to depend on mobile phones for short-range and duration communications. Apart from the issues and expense of roaming outside the UK, the connection time is too long and the likelihood of a reliable signal is low when in a remote location.

Choosing a Radio
I had been looking at various models of CB for a while, I wanted a euro-compatible model as I would most likely use the CB abroad more than in the UK. This would allow me to switch the frequency range to suit whichever country we are visiting. The other important requirement was a unit that would take up little room in the Defender cab.
Considerations for Europe
Most of the suppliers had pretty much the same range of products, but prices did vary slightly. All seemed to do various kits or packages. I was not after a sophisticated CB as long as it covered the Eurozone.
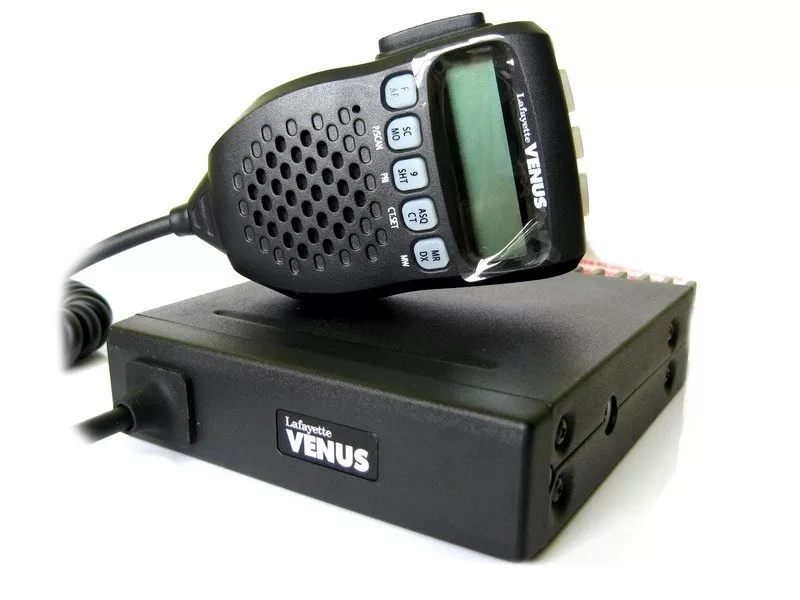
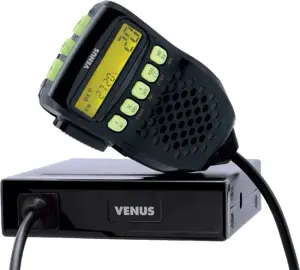
After much browsing and looking at reviews, I narrowed my choice down to two. These are the Intek M-100 Plus and the Lafayette Venus. Both are small units, the Intek is narrow at 100mm wide and about 37mm high but has made up for its slender face by being slightly long at about 200mm including the rear plug and front knobs. The Intek has the a fairly conventional layout with a simple handset and the main unit housing the controls and display. The Venus CB unit is also slender at 108mm wide, 29mm high and 136mm deep. The big difference of the Venus from the Intek is that the layout is not that conventional. It has a plain base unit, with a fairly complex handset that houses the display and all the controls. This gives the Venus a fairly complex look.


The advantage of the Venus layout is the base unit is discreet. This is the main attraction to me. In many countries CB is illegal or at least frowned upon. So in the case of the Venus, I can simple disconnect the handset and stow it out of sight and also unscrew the antenna from the rear of the vehicle. This will mean that it should not be noticed that we have a CB at any borders. I can go one step further also. The unit has a power connector so to completely remove the base unit it is simply a matter of disconnecting power and antenna plugs, these stow being the fuse panel in the Defender out of sight and the base unit can be hidden anywhere. In the picture on the right you can see how the cables would be stowed behind the cover to the left of the CB unit. I had considered mounting the module under the cubby box or inside the cubby box, but in the end I decided against it for amongst other reasons heat dissipation.
We are in the strange situation this year, that I actually am travelling with people from the outset and needed to source a CB for them also. This gave rise to the opportunity to buy both the Intek and the Lafayette. The Intek should be good for their use as it is easy to stow and use in an adhoc manner thanks to the 12 volt plug that is fitted. This gives the opportunity to test both radios for a month on the road. If the Venus turns out to be a dog, then I’ll swap for the Intek.
Installation

I decided that I would mount the antenna to the rear of the vehicle with a body mount. This position allows the antenna to be mounted high, which should aid the range of the CB, it also proved fairly easy to get a decent SWR reading, though out both the UK and Euro bands I get a maximum reading of Circa 1.4.
We may have to review this antenna location once we fit the roof tent. I hope to mount the tent on the front half of the vehicle thou. Which should avoid issues with SWR changing.
For power, I connected the CB positive and negative directly to the fuse panel linked to my secondary battery. This ensures I do not increase the risk on the start battery and also ensures I have a decent earth to the vehicle and hence the antenna ground plane.
Once powered up the CB is surprisingly intuitive to use. Power, volume and channel selection are carried out via the top three buttons. Scanning and squelching via the buttons on the front. I have not had a chance to carry out any decent conversations yet, but have listened to a few, audio is very clear, thanks to two speakers. I am hopeful that the Venus will be a decent performer. We’ll let you know once we have used it over the summer.
How To Install and Test a CB Radio Antenna
When installing the antenna and CB it is important to do a few basic things to ensure success.
I am detailing this due to the amount of CB problem posts I see on forums. These should be done before you try and use the CB for communications.
- When fixing the mount to the vehicle, ensure that it is positioned so that the antenna does not have a lot of metal bodywork running up the side of it, especially by the coil at the base of the antenna if you have one. See the first photo on this post.
- Make sure the mount earth has a good bond to the body panel you are fixing it to. It may be necessary to rub the paint away, then seal it with silicone over the mount to prevent corrosion.
- Ensure that the earth and antenna feed are isolated from one another.
- The easiest way to check this is by testing the CB antenna feed plug (the plug you put in the back of the CB). Check from the centre pin to the barrel (shield), using a multimeter set to the ohm range. This should be an open circuit or at least many Mega ohms. Try not to touch the barrel or probes, you will cause a lower reading, depending on how conductive you are!
- Next, check the barrel of the plug to earth this should be very low I would aim for less than 0.5 ohms.
- If these readings are good then you have the basis for a good SWR.
- However. You must ensure you use decent quality cable, which is 50 ohm, ideally a decent RG58, with both foil and braided shield. Try to avoid routing via noisy electrical components.
- The power wiring of your CB should be ideally straight from the battery positive and negative. Mine is linked to the second battery fuse panel on my split charge. Make sure it is fused properly!
- Finally, check that the negative wire of the power to the shield of the antenna feed also has a low resistance. If not you need to fix this and aim for less than an ohm.
- Next, connect up your SWR meter and ensure you are outside in a clear area. Follow the instructions that you have with the meter, you need to get this as low as possible. Personally I was happy with the reading I got over the whole range Which was less than 1.4. You should work to be at least below 1.5.
I hope this helps people, I wish I had a pound for each high SWR reading. If I missed anything or it is not clear let me know, and I’ll clarify or update.
Troopy – UHF CB Radio Install
Check out this comparison of UHF Radios in Australia, where we compare Uniden, Icom, Oricom and GME.
As part of our Troopy overland build, we will be installing a GME Radio, we’ll link to a post when available.

Dan’s a windsurfing, adventure-seeking nomad with a passion for exploring the globe overland and an Engineer. Having grown up in the Middle East, he brings a unique perspective to Getting Lost Again, sharing his love for discovering hidden gems and embracing the unexpected. When he’s not on the road, he finds inspiration in windsurfing and other creative pursuits – and is equally at home under a vehicle solving problems as he is exploring a new place.