Troopy Build Series: 2kW Diesel Heater Installation
Why Install Heating in the Troopy
Nothing is worse than not enjoying a road trip because of discomfort. We are planning on using the Troopy as a camper in a variety of climates in countries all over the world, and to be honest, we don’t want to freeze our arses off! When we are not outside because of the weather, we want to chill out inside the vehicle, working on the road or relaxing.
We plan to earn money as we travel, so inside comfort is essential for a quality laptop lifestyle.
Whilst we have been building the Troopy with our Global Overland trips in mind, we have been careful to consider the situations we will be in and the options to keep us comfortable. From layers of additional clothing to the diesel heater which we are about to discuss here and even a 12V heated blanket.
Installing a diesel heater will allow us to:
- To extend the seasons and climates we can use the vehicle in. Allowing us to enjoy peaceful places even in the winter.
- Efficiently heat the vehicle for many hours at a time. We will be using our extended-range Lond Range Automotive 155L fuel tank, which has an extra fuel pickup specifically for the heater.
- Not be forced to dress up like Eskimos.
In this post, we will run through the why (above ⬆️) of the installation and our reasons for wanting a heater. The what – as in what are we installing and how does it work practically in this situation, for example, how are we going to mount and connect the heater system, then also how we did the actual installation in the vehicle looking at what was involved.
What are we installing and how does it work
The rear setup or living area of the 70-Series Troopy is fairly small in volume, especially in comparison to a caravan or motorhome. Considering the volume occupied by the cabinets, there is not much space to heat. Given this we chose to install a 2kW heater, they typically come in two standard sizes 2kW and 5kW. Research around the internet mainly on caravans suggested that an area of up to 25m2 could easily be heated by a 2kW heater.

Where to buy a 2kW heater like this – Check out the price here…
In simplistic terms, the diesel heater is a small and efficient unit that uses diesel fuel from a small auxiliary tank or vehicle tank to create warm air. The heater connects to fuel, power and various ducts to support combustion/exhaust and warm air production and circulation.
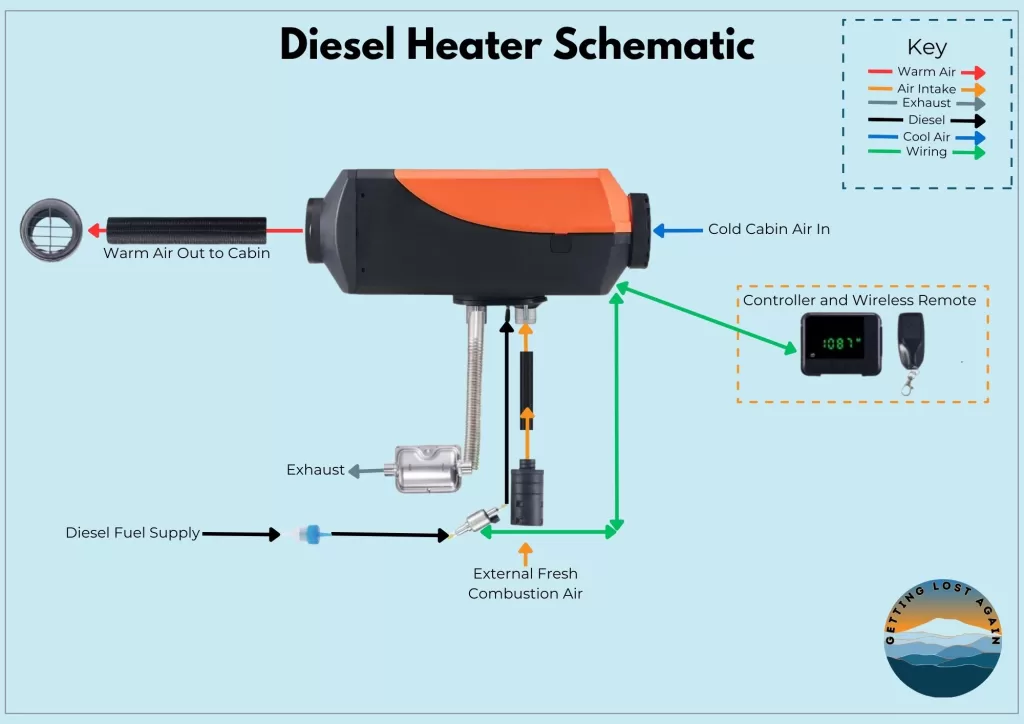
We have created a simplified schematic drawing of the heater system below.
Basic Diesel Heater Connections
Before planning an installation, it is worth becoming familiar with the necessary connections required to support a heater.
- Power Connections – 12V Supply to power the heater controller and pump (Diagram – Green Lines)
- Control Connections – Connections between the heater, control panel and to the fuel pump (Diagram – Green Lines)
- Fuel Connection – Clean diesel supply. We have opted to take directly from the vehicle auxiliary fuel tank (Diagram – “Diesel Fuel Supply”).
- Combustion Air Intake – External to the vehicle living space, provides clean air for combustion (Diagram – “External Fresh Combustion Air”)
- Exhaust Output – External to the vehicle living space, exhaust air out of the vehicle. Vital to keep this outside the vehicle living space (Diagram – “Exhaust”)
- Cold Cabin Return Air Intake – This is the air intake for warming, normally this is taken from inside the vehicle (Diagram – “Cold Cabin Air In”)
- Warm Cabin Supply Air Output – (Diagram – “Warm Air Out to Cabin”)
How do Diesel Space Heaters Work?
These heaters are relatively simple in construction and operation. The core principle behind their operation is straightforward: the combustion of diesel fuel to produce heat. The basic premise is that they draw in cool air, via the internal heat exchanger and output warm air as a result.
Heat is generated by combusting a small amount of atomised diesel in the combustion chamber. Heat output is regulated within limits by the heater’s controller, which manages the amount of fuel burnt and the fan speed. The amount of fuel provided is in turn controlled by the fuel metering or dosing pump and the frequency of operation, when more heat is required, the pump operates at a higher rate (frequency) giving more fuel to the combustion process, when less heat is required the pump operates at a lower frequency. The heater has a glow plug which initiates the combustion process.
The heat generated by this flame is then transferred to a metal heat exchanger. Functioning similarly to a radiator, the heat exchanger efficiently absorbs thermal energy from the combustion process. Meanwhile, a built-in fan actively draws in ambient air from the cabin, directing it across the heated surface of the heat exchanger. Through this convective heat transfer, the air is warmed and then circulated back into the living space by the same fan, raising the overall temperature.
The byproduct of the combustion process, exhaust gases, are safely vented outside through a designated exhaust system. This crucial separation of the combustion and cabin air ensures a clean, odour-free, and healthy environment within the enclosed space of the Troopy.
Parts and Tools
In this part, we will discuss the Parts/Components and special tools needed. It is worth noting that there are some subtleties to what will be needed to complete the installation on your vehicle. So first we’ll run through those then I’ll provide a list.
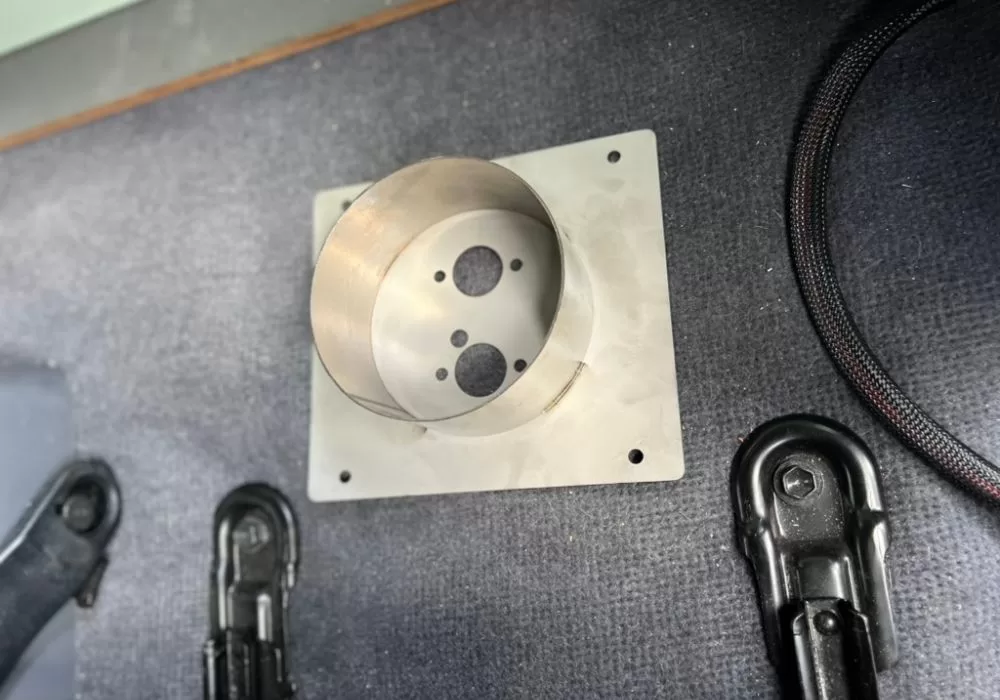
Diesel Heater Mounting Turret
Typically the floor of your vehicle will not be flat. In the back of the Troopy, the floor has corrugations that are about 20mm in depth. Additionally, the heater will be mounted in a cupboard, in our case the cupboard and the floor are both 12mm play, so that is an additional 24mm of distance that the heater exhaust and air intake have to protrude.
The purpose of the mounting turret or adapter plate is to allow for the thickness of the vehicle floor including its unique features and corrugations and any cabinets or panels the exhaust and air intake need to pass through.
In our case we chose to use a 60mm adapter plate, they are available in various depths, a quick search on Amazon or Google will show you the variety available. We also chose a stainless steel turret rather than steel, or galvanised steel, for longevity.
Fuel Line – Smoking Diesel Heater
There have been many reports of white smoke coming from diesel heaters which are not working efficiently around the internet, this often occurs after a few hours of initial operation. When this happens, it is important to rectify the issue immediately, because whilst white smoke is the obvious symptom, the combustion chamber will accumulate significant carbon buildup.

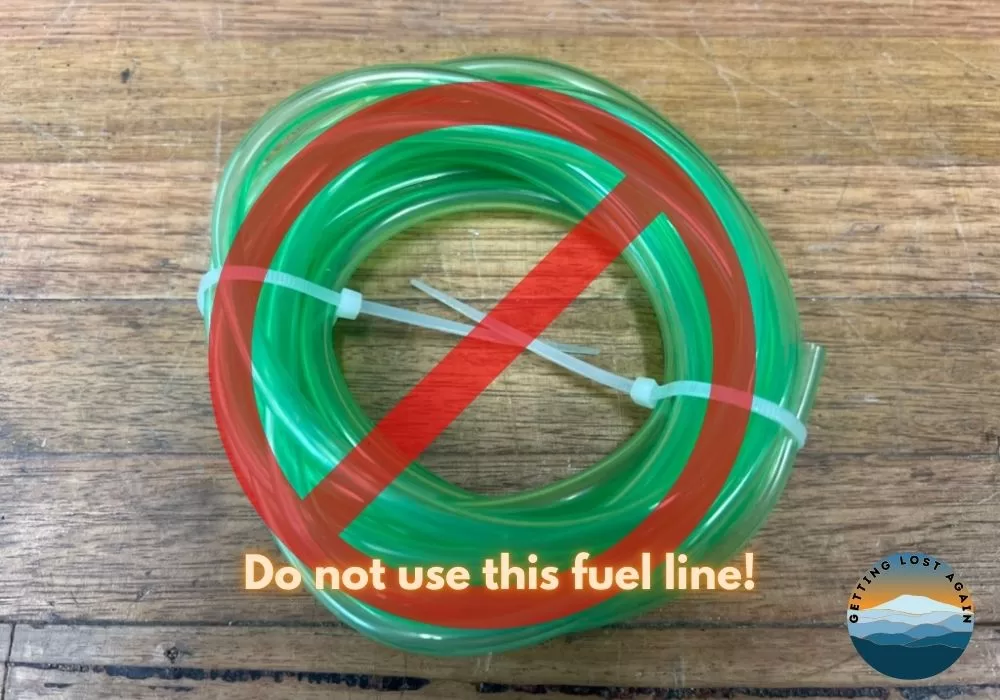
The issue is caused by the heater’s fuel system not working correctly, which results in inefficient burn. The main cause of this is incorrect fuel dosing. This can be caused by the pump not being installed correctly, it should be installed at a 30-degree angle or by poor quality fuel line. The fuel line should be a rigid narrow-diameter hose, which does not flex when the dosing pump operates.
Many cheaper heaters supplied by Chinese internet brands come with a very flexible large bore hose (often green), see picture. This hose should not be used, it prevents the correct dosing occurring and also does not allow any air in the fuel line generated by cavitation to be dissipated effectively.
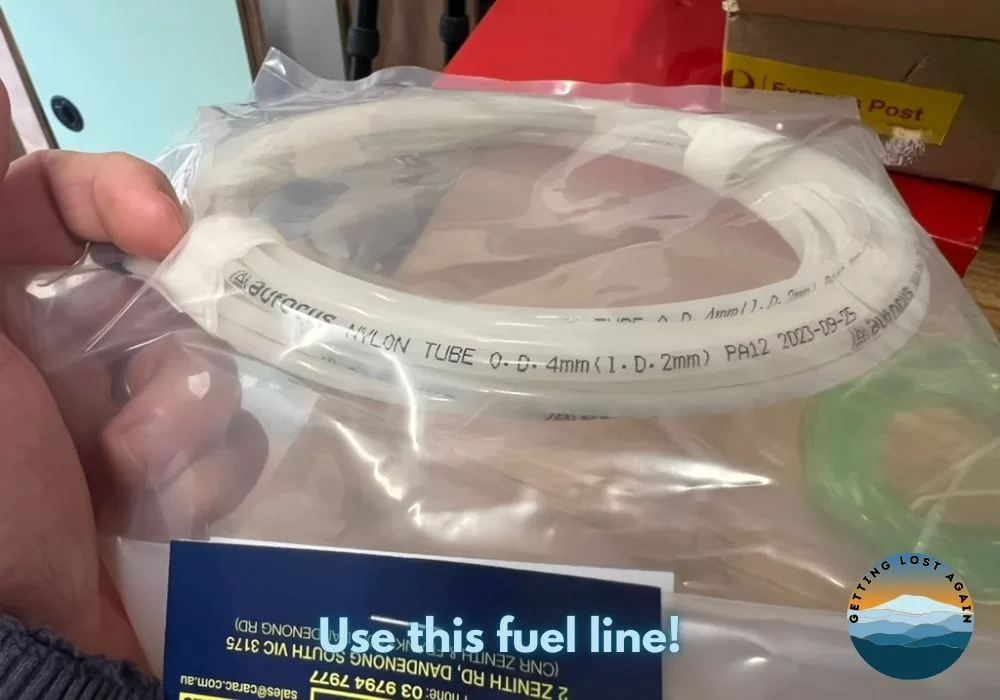
The reason that the fuel line is so important is that the fuel dosing pump is sensitive to the weight of the fuel it is picking up to maintain effective dosing. An incorrect fuel line as shown will mean that too much fuel is picked up for the pump to operate correctly and that as the pump operates the hose flexes preventing correct dosing.

This video does a great job of explaining and demonstrating why the fuel line and system setup are so important to ensure the effective and reliable operation of a space heater. There should be no visible white or black smoke when the heater is operating correctly.
Diesel Heater Parts and Special Tools
- 60MM Turret Plate – Available Here
- 2kW Diesel Heater – Available Here
- 2mm Fuel Hose – Available Here
- Sika Flex 227 – Available Here
- 127mm / 5″ Hole Saw – Available Here
- Hole Saw Arbour – Available Here
Installation Method
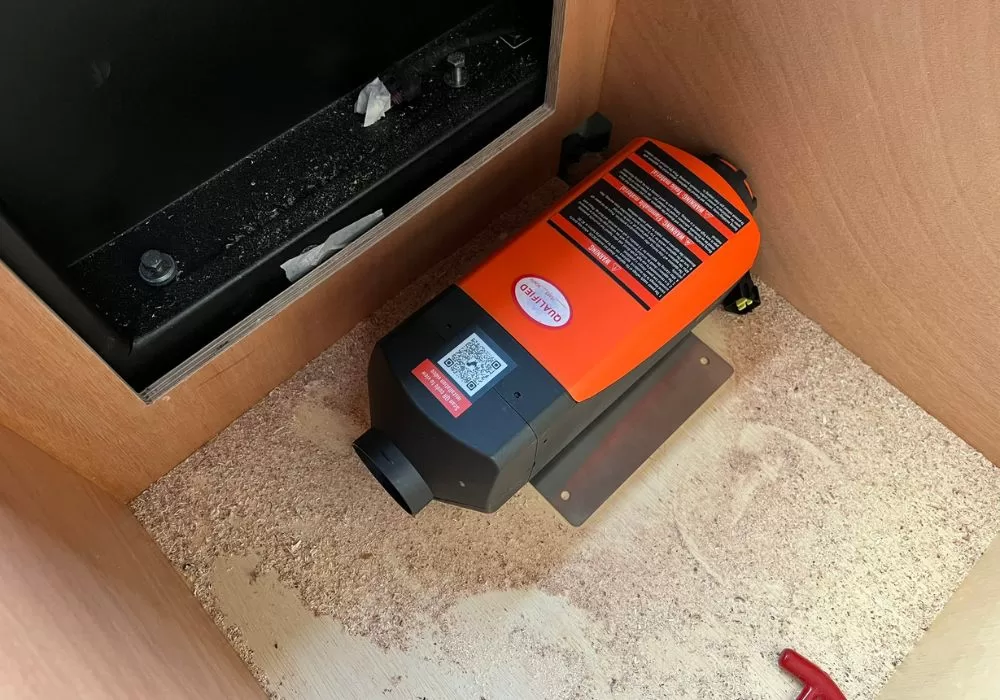
In this build the heater has been installed behind the passenger seat near where the second-row seat mounting bolts would have been. Below is the basic sequence of the installation.
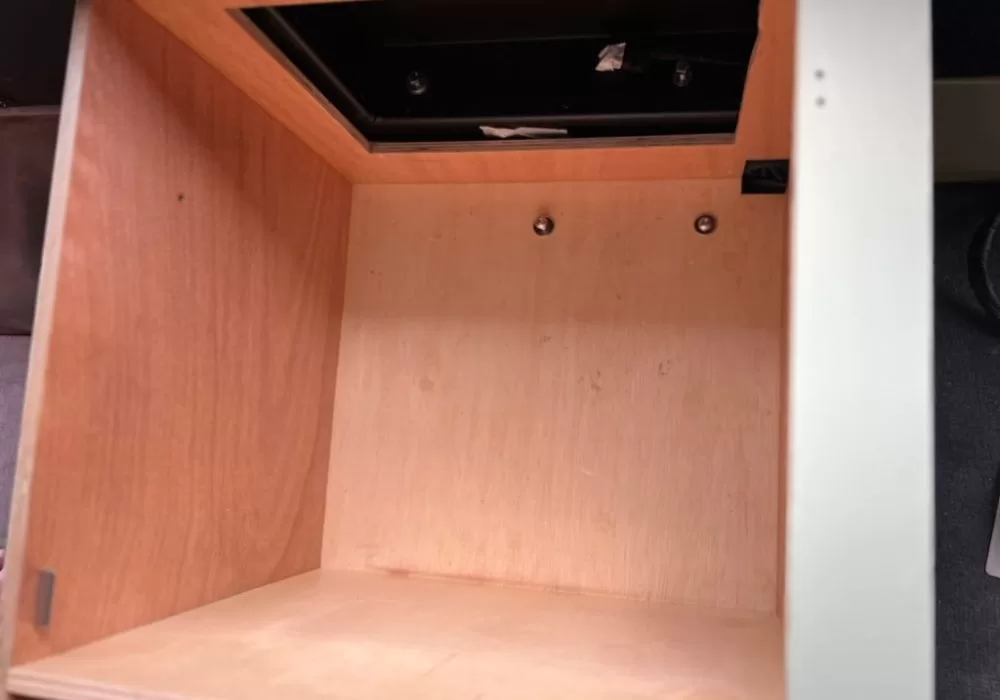
Mounting location in the forward most cupboard of our cabinet setup. The two screws visible here are the mounting bolts for the cupboard which use the old second-row seat mounting plates.
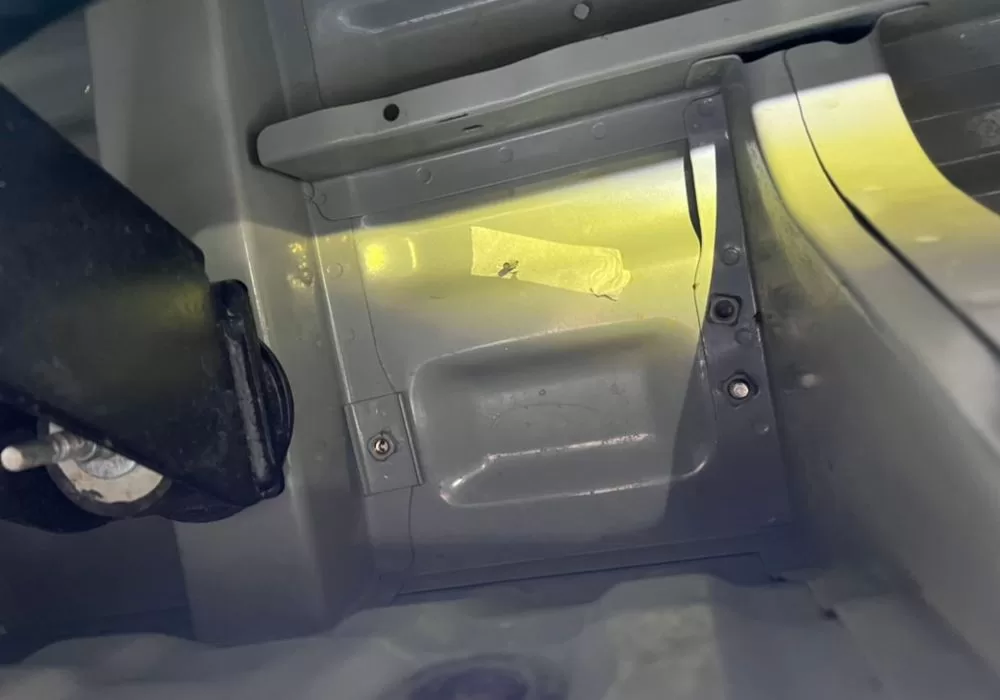
Mounting position from below.
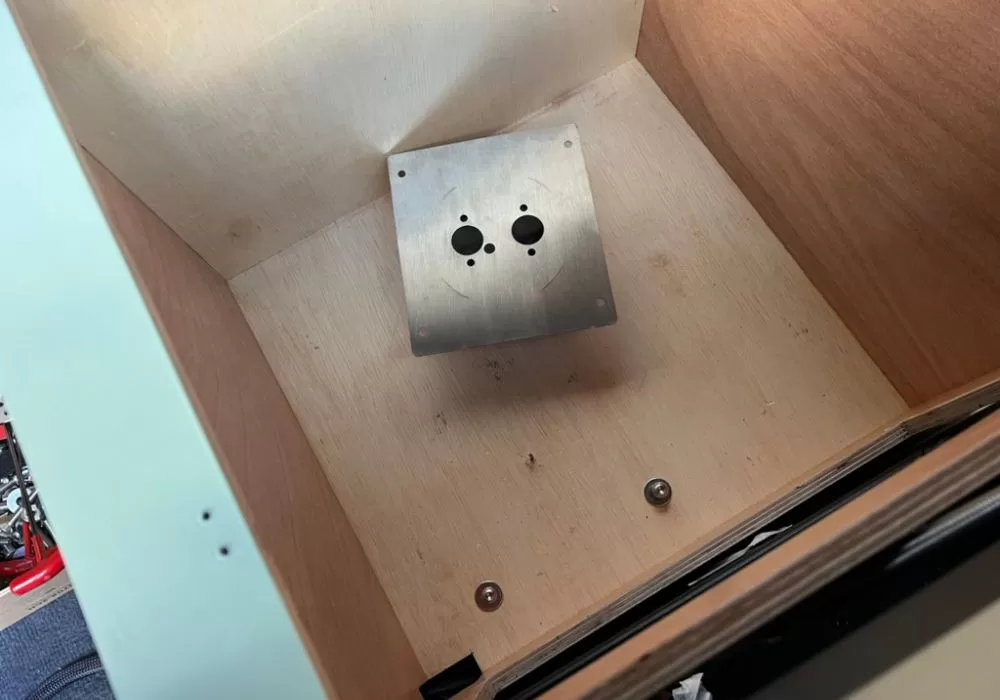
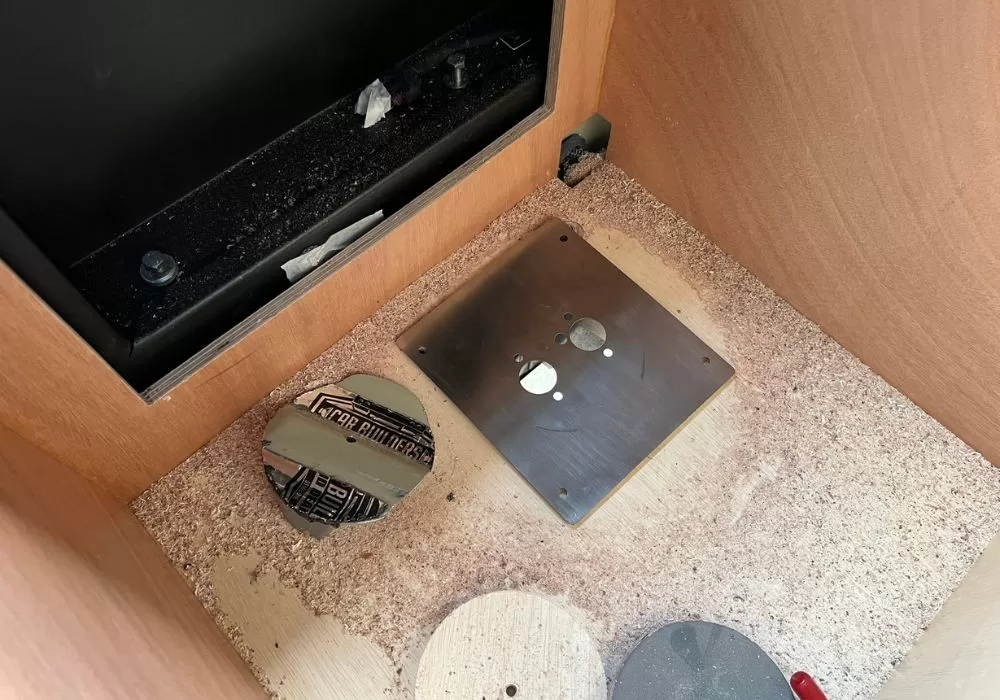
This is the heater mounting turret or adapter plate, that will be located to support the heater and aid transition through the floor. In this case the turret is 60mm in height.
The mounting turret needs a 127 mm/5″ hole to penetrate through the floor.
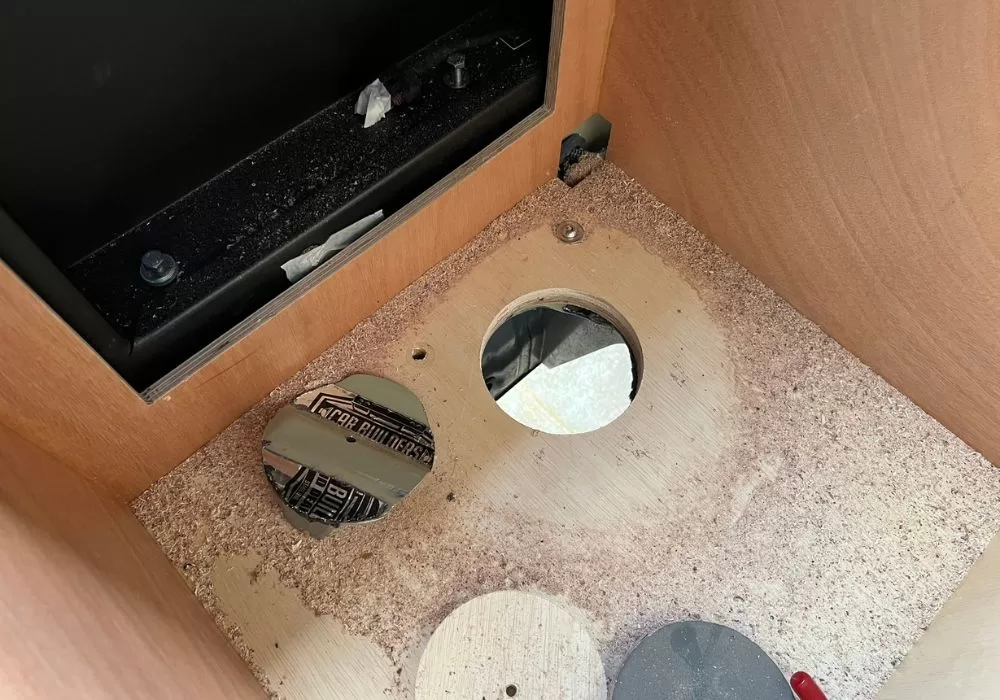
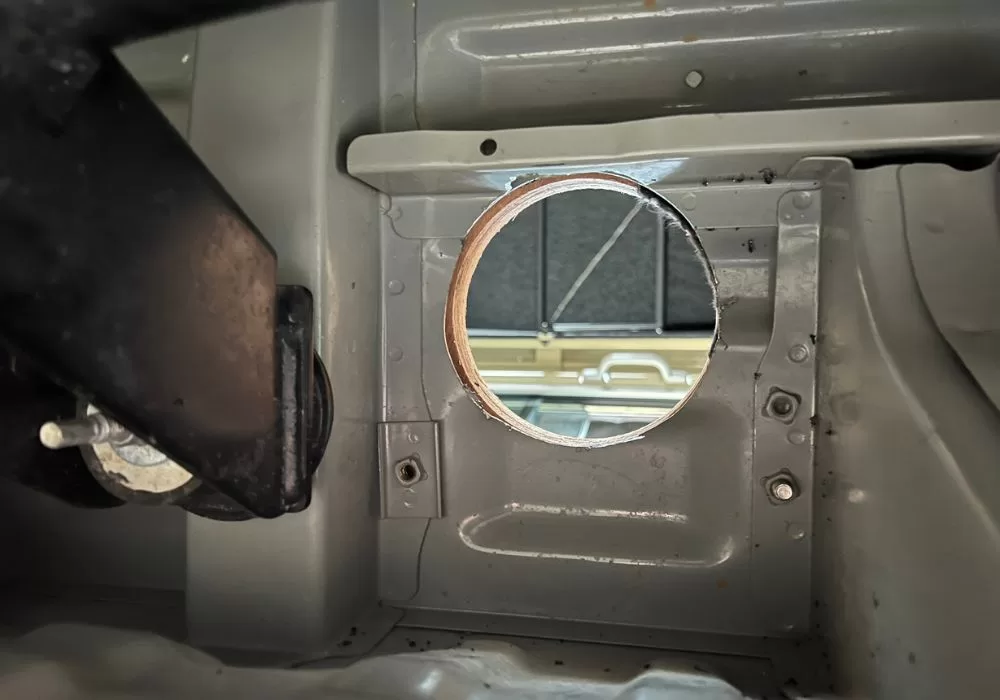
Hole from underneath
Checking the plate location.
Test fitting the heater in situ. The end nearest the cupboard wall is the intake. This will have a hold cut to draw cold cabin air for heating.
text
The heater, Air Compressor, and wiring were installed. They are almost completely tidy. The cabinet required some modifications to fit the air compressor in the side wall of the vehicle.
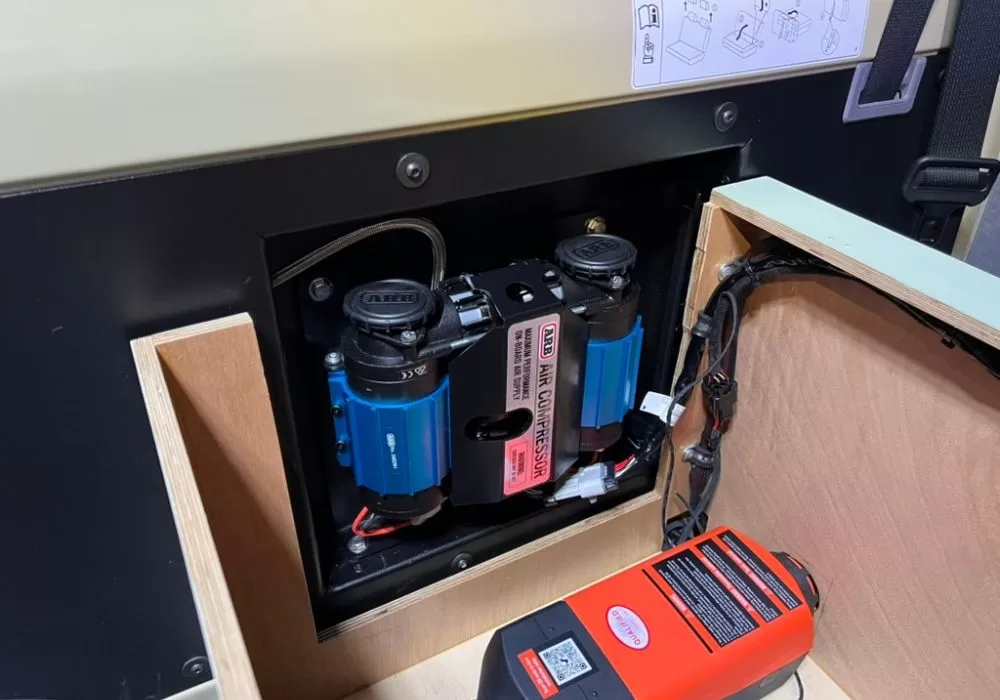
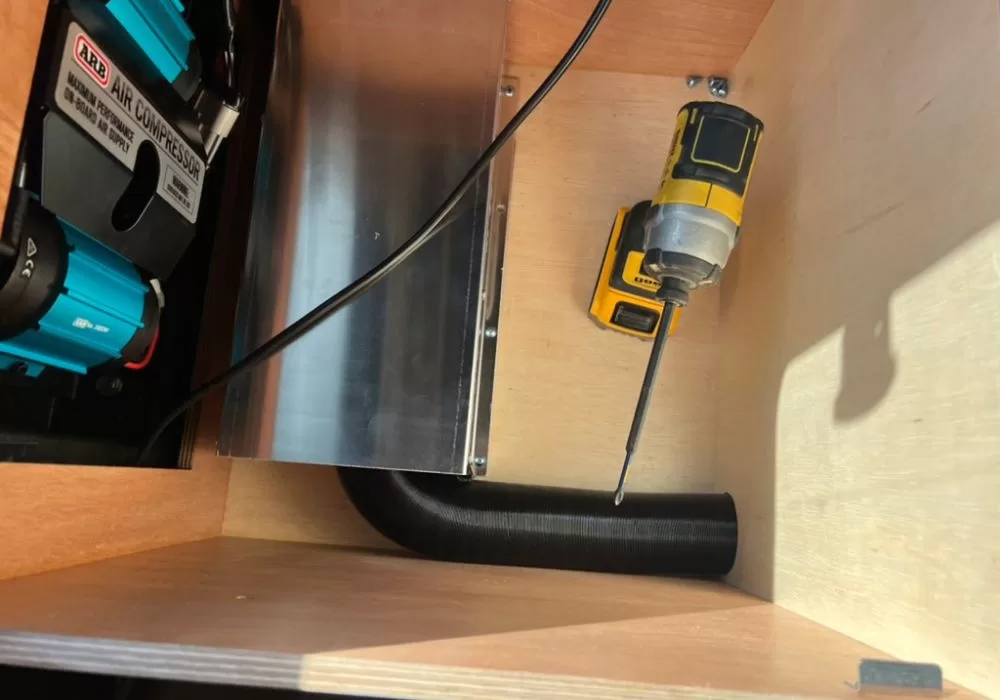
The heat shield shroud cover is fitted, and the output duct is in place. You can also see the cabinet modification here.
The lower side is sealed with sika flex. The cabling here was secured out of the way until the fuel system was ready for connection.
Fuel System Connection Options
There are several options that can be explored when it comes to connecting the diesel heater to the vehicle fuel system. These options include:
- Additional Plastic Tank: Most of the diesel heater kits I have seen come with a small plastic 5-or 10-litre fuel tank. These seem to be designed for caravan and camper trailer installations. The tanks can be mounted on a wall and come with provisions for this. On the Troopy, this is not an option, as the only viable place to mount this type of tank is internal to the living area. We did not want to risk the smell of diesel inside the vehicle.
- Connect to the existing Fuel system: Many people talk about connecting using a t-piece hose fitting to either the vehicle’s supply or return fuel lines. We chose not to do this because I did not want to interfere with the OEM fuel system of the vehicle and risk the vehicle warranty, should the need arise with Toyota.
- Add a fuel Pickup: Another option that seems to be common on VW Transporter installs is to add an additional fuel pickup to the OEM fuel tank. On many vehicles, there is actually already a provision for this.
- Custom Tank Option: We connected to our new long-range auxiliary fuel tank via a dedicated fuel pickup.
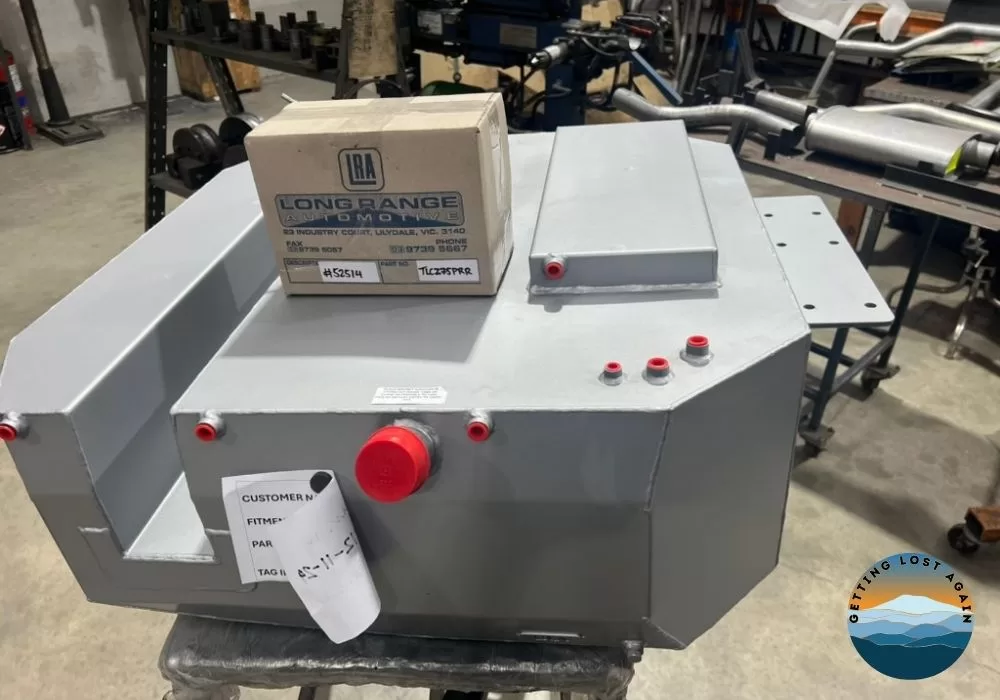
Long-Range Auxiliary Fuel Tank
In the end, the easiest option, which might sound crazy, was for us to add a pickup to our new long-range fuel tank. This was the easiest option because we had planned to install a larger auxiliary tank anyway for some of the longer, more remote trips we planned.
Since these tanks are made to order, it was easy to ask Long Range Automotive (LRA) to add an extra dropper, about 100mm (4″) short of the tank’s bottom, for a small additional fee. This shorter dropper ensures we do not run the tank dry and always have fuel to drive out! The tank had a lead time of around five weeks, which suited us.
Fuel, Exhaust and Air Connection
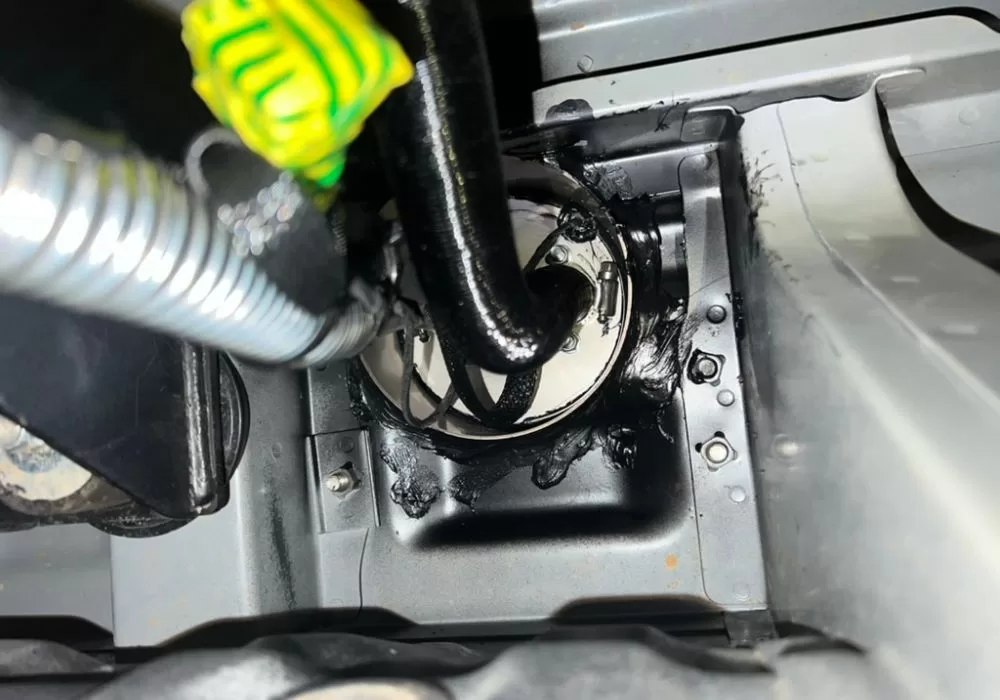
Fuel is connected at the heater using the white fuel line to a rubber hose on the inlet connection.
The heater’s exhaust was routed over the Troopy chassis rail and clamped to the Torqit exhaust using a stainless steel hose clamp.
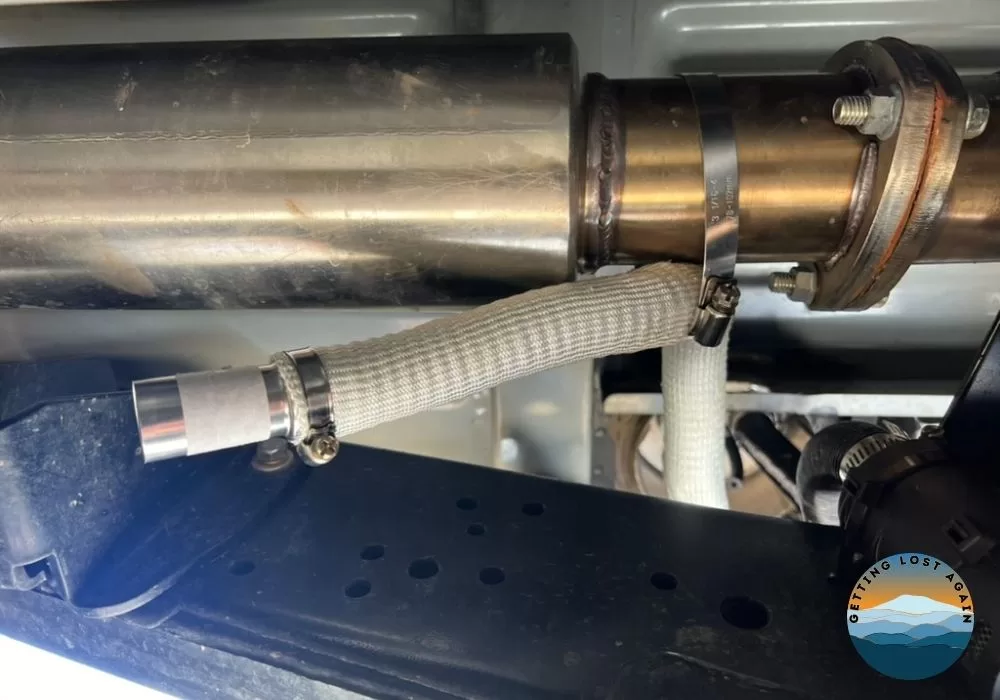
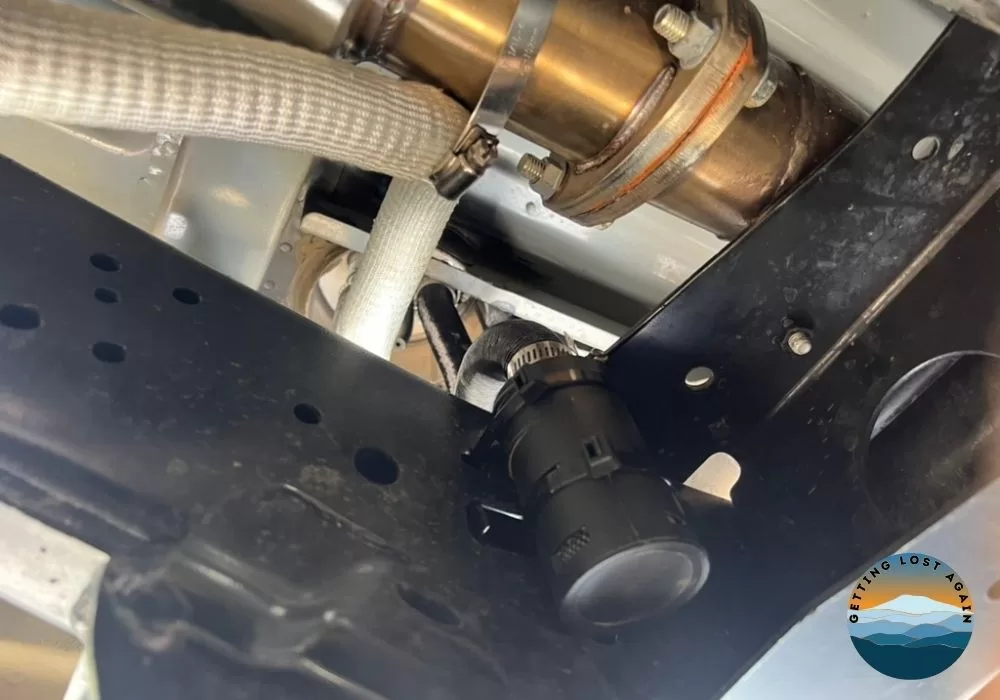
The heater’s air intake is also routed over the chassis rail, being careful to remain clear of the exhaust. It is secured to the inside of the chassis rail and behind the cross member to provide impact protection.
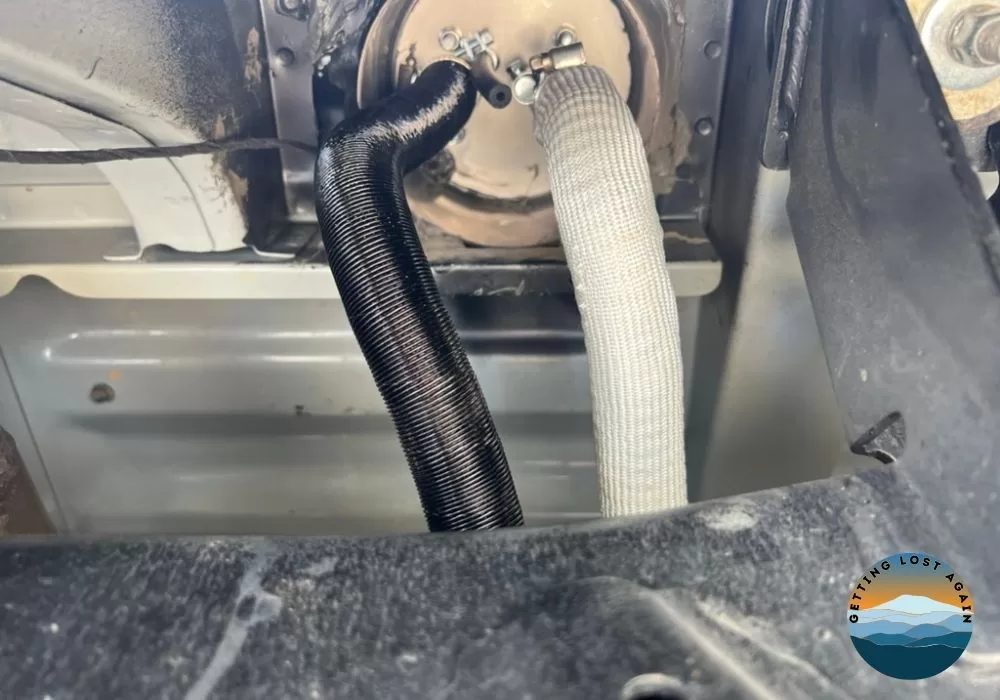
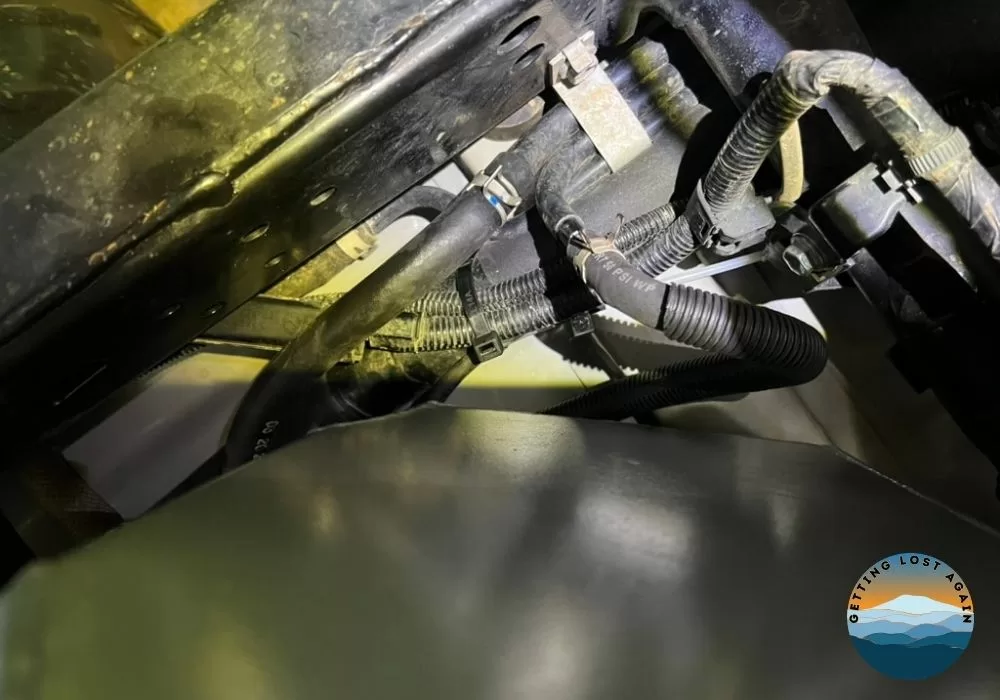
If you look very carefully here, you can see the white fuel line to the diesel heater running from the aux fuel tank connection forward to the heater; the line follows the existing fuel pipes and hoses.
When the fuel line reaches the cross member, it crosses the vehicle to the rear of the cross member, passing through the fuel filter and then the fuel dosing pump, which are both secured to the cross member.
Conclusion
The installation has been very successful. The heater fired up the first time and ran very well. However, we found a tendency for the pump to overdose the heater at very high settings, which can lead to white smoke.
Having said that, the day we tested the heater, it was 35C outside. We’ll test further in cold weather. On a cooler day, we did not notice this issue. On lower settings and cooler days, the heater runs very well, and to be honest, I can’t imagine we will need to run it above the lowest settings, given the tiny space we are heating!
If we find this to be an issue, we may explore a lower-dose pump.
Let us know what you think in the comments.

Dan’s a windsurfing, adventure-seeking nomad with a passion for exploring the globe overland and an Engineer. Having grown up in the Middle East, he brings a unique perspective to Getting Lost Again, sharing his love for discovering hidden gems and embracing the unexpected. When he’s not on the road, he finds inspiration in windsurfing and other creative pursuits – and is equally at home under a vehicle solving problems as he is exploring a new place.