Troopy Build Series: Air Conditioning Upgrade – Freezebrain
Toyota 70-Series Aircon Performance Mod
This post will show how we improved the LandCruiser aircon by upgrading the AC Control Amplifier, without spending a fortune or investing a considerable amount of time. This mod will allow the evaporator temperature to go from the standard setpoint (6 Degrees Celcius) to 1 Degree Celcius.
The guys at Workairtech have developed, Freezebrain, which is a solution to the performance limitations of the standard Toyota Airconditioning system, that takes less than 10 minutes to install.
We were lucky enough to get the opportunity to try this device. In this post, we show what the Freezebrain is and how to install it in your vehicle.
Overland Build Series
This post is part of the Troopy Build Series that we are currently writing, which shows how we have built our 78-Series LandCruiser into our next Overlanding Rig. Check out the vehicle build overview here.
Freezebrain Installation
- Toyota 70-Series Aircon Performance Mod
- How Freezebrain Works to Improve Aircon Performance in a 70-Series?
- Product Overview
- Installation Process
- Step 1 – Tools Required
- Step 2 – Remove Glovebox
- Step 3 – Remove 10mm Speaker Grille Screw
- Step 4 – Remove the Lower Speaker Grille
- Step 5 – Remove Upper Trim Panel
- Step 6 – Loosen 10mm AC Amplifier Securing Nut
- Step 7 – AC Amplifier Securing Nut Removed
- Step 8 – Removed AC Amplifier via Glove Box Cavity and Disconnect
- Step 9 – Removed AC Amplifier Cover
- Step 10 – Removed OEM (88650-60G20) AC Amplifier PCB
- Step 11 – Insert Freezebrain AC Amplifier PCB
- Step 12 – Replace AC Controller Case Cover
- Step 13 – Reconnect AC Amplifier to Vehicle Connector
- Step 14 – Resecure Amplifier Securing Nut
- Step 15 – Replace Trim Panels and Glove Box
- Test Your Vehicle
How Freezebrain Works to Improve Aircon Performance in a 70-Series?
Freezebrain significantly enhances the 70-Series air conditioning performance by overcoming a fundamental limitation of the factory system, which in the standard form is designed with a restriction on evaporator temperature.
The factory AC controller inherently limits the evaporator’s ability to reach temperatures below 6-7 degrees Celsius, even at maximum cooling settings. The Freezebrain amplifier effectively bypasses this constraint, enabling the evaporator to achieve significantly lower temperatures, down to as low as 1 degree Celsius. This substantially increases the system’s cooling capacity, delivering noticeably colder air to the cruiser cabin, even in extreme heat conditions.
Essentially, the Freezebrain removes a performance bottleneck in the 70 Series AC system, allowing it to operate closer to its full potential. This simple yet highly effective solution addresses a common complaint among 70 Series owners, ensuring a comfortable cabin environment even in the harshest Australian climates.
Product Overview
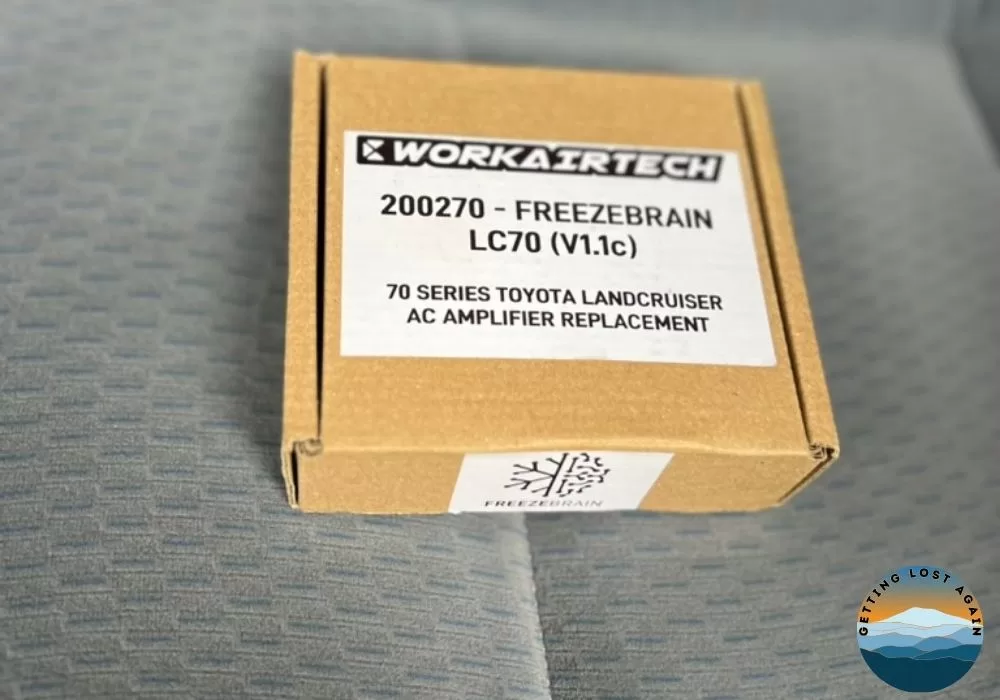
The Freezebrain PCB comes in a box about 120mm square, in the box you will find an anti-static bag, which contains the PCB and the installation instructions.
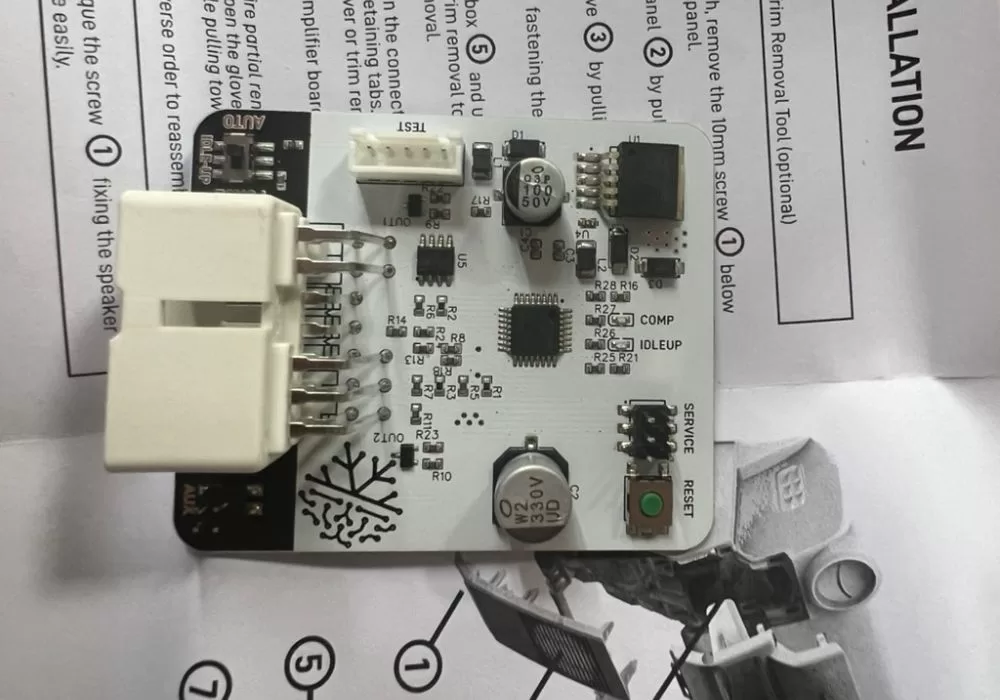
The PCB is a Plug-n-Play solution to improve the performance of the bog standard Cruiser aircon, which promises to lower the evaporator temperature to around 1 degree.
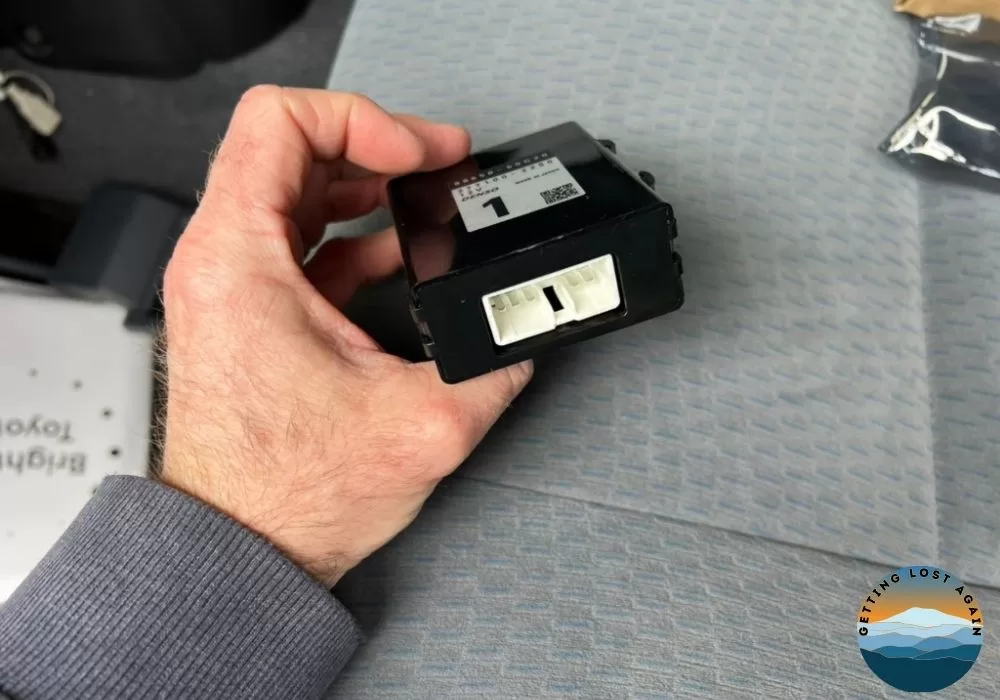
The PCB is a replacement for the OEM Denso air con controller module or AC Amplifier (88650-60G20). The whole installation process took me around 6 minutes.
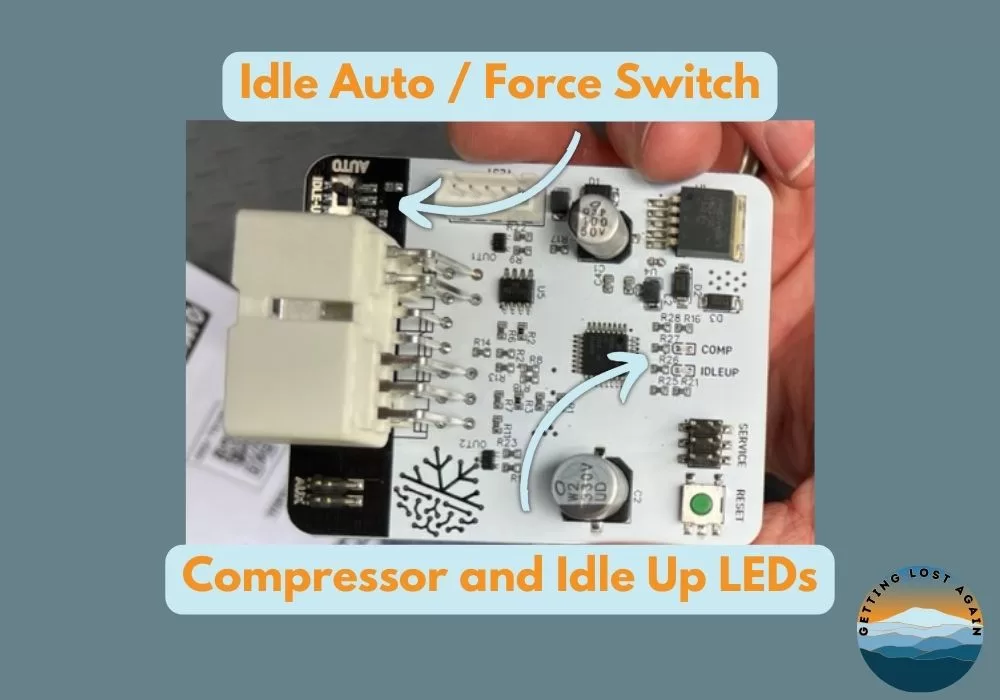
Freezebrain retains the standard functionality in default mode, but also offers the option to change the idle behaviour of the vehicle. The PCB has a switch, which allows the vehicle to change from automatic idle-up when the compressor is running to always idle-up. Workairtech, says this could be a preferable option for those running complex 12V setups, which could improve charging performance.
In addition to this, the PCB also includes some handy indication LEDs which could be useful to help understand faults with the AC system and also indicate the operational state of the aircon. These indicators are on both sides of the PCB and require that the PCB be removed from the housing.
The Status LEDs indicate:
- COMP – Compressor Running
- IDLEUP – Engine Idle Up
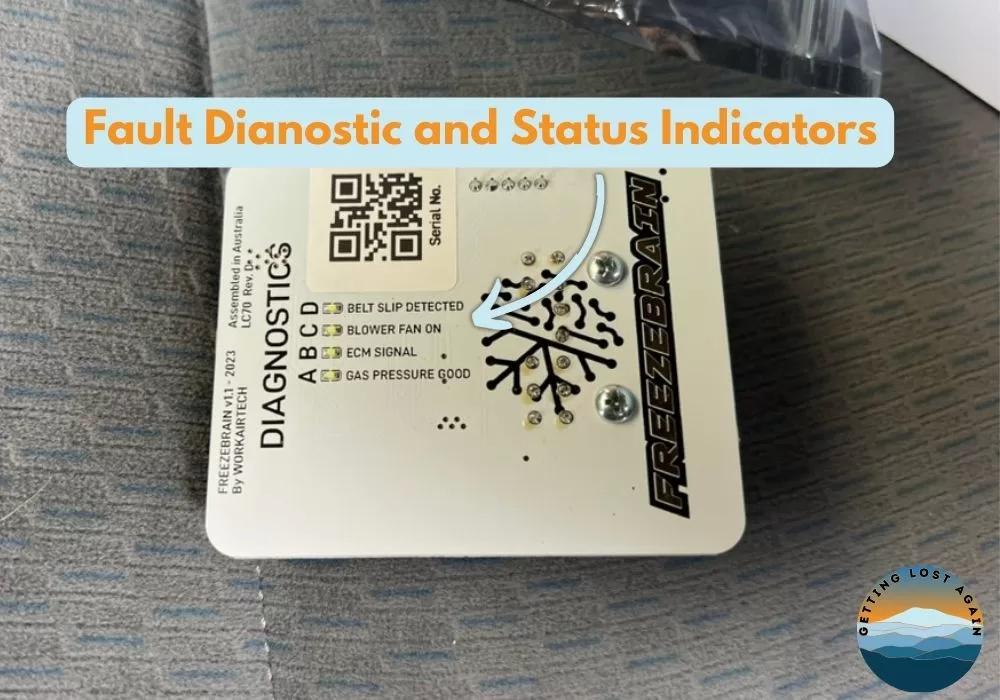
70-Series Air Conditioning Fault Diagnostics Indicators
The Diagnostics LEDs indicate:
- Belt Slip Detected – On to indicate that the compressor belt has slipped
- Blower Fan On – On to indicate that the Blower should be running
- ECM Signal – On to indicate aircon demanded from ECM
- Gas Pressure Good – On to indicate adequate gas in the Aircon system

Troopy Build Series: If you want to know more about our 70-Series LandCruiser Overland Build check out this post, which has an overview and links to all the other posts.
Installation Process
How to install the Freezebrain PCB.
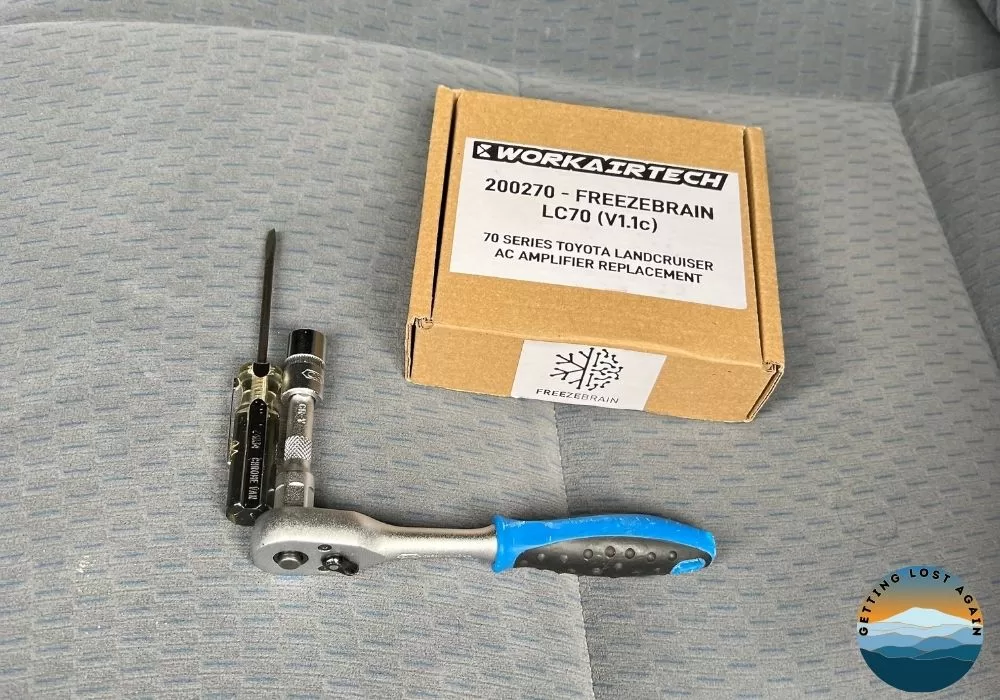
Step 1 – Tools Required
In order to complete this mod, you will need a 10mm socket and extension the extension should be at least 150mm for easy access, although shorter is not the end of the work.
You may also need a flat-blade screwdriver to help release the AC controller case tabs.
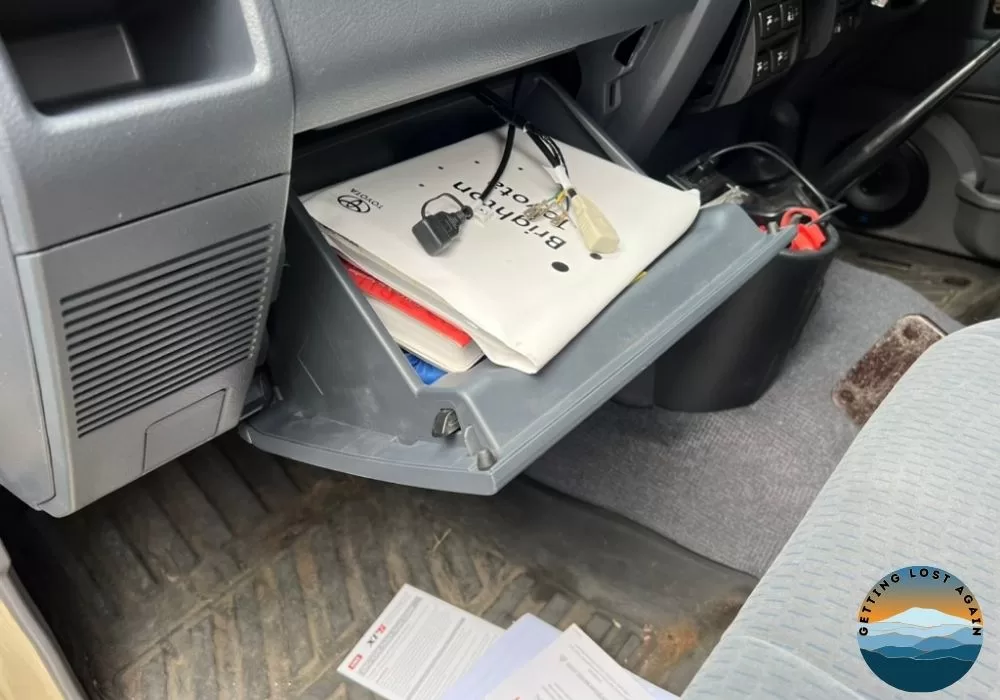
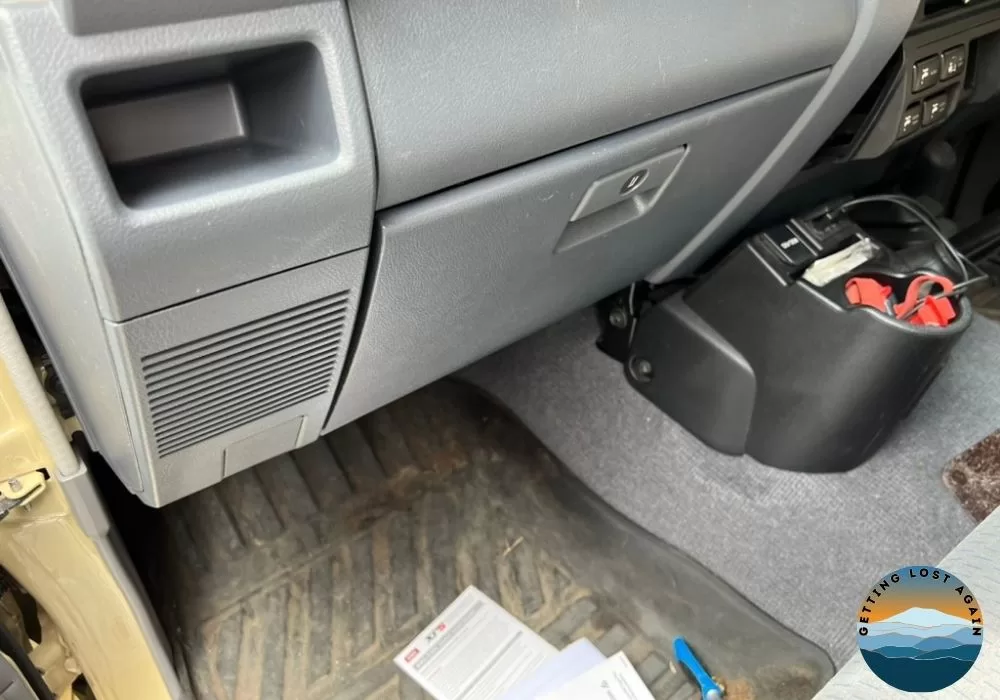
Step 2 – Remove Glovebox
Remove the glovebox by pressing the securing tabs in at the side, the pulling the glovebox to the rear.
Step 3 – Remove 10mm Speaker Grille Screw
Remove the single 10mm screw at the bottom of the speaker grille. Keep that in a safe place, so that you can replace it later and that it does not end up in your tyre.
Checkout the Troopy Water System design, installation and build

Step 4 – Remove the Lower Speaker Grille
Remove the lower speaker grille by pulling to the rear gently to release the snap tabs.
Step 5 – Remove Upper Trim Panel
Remove the upper trim, by pulling towards the rear. This is also held in place by snap tabs.

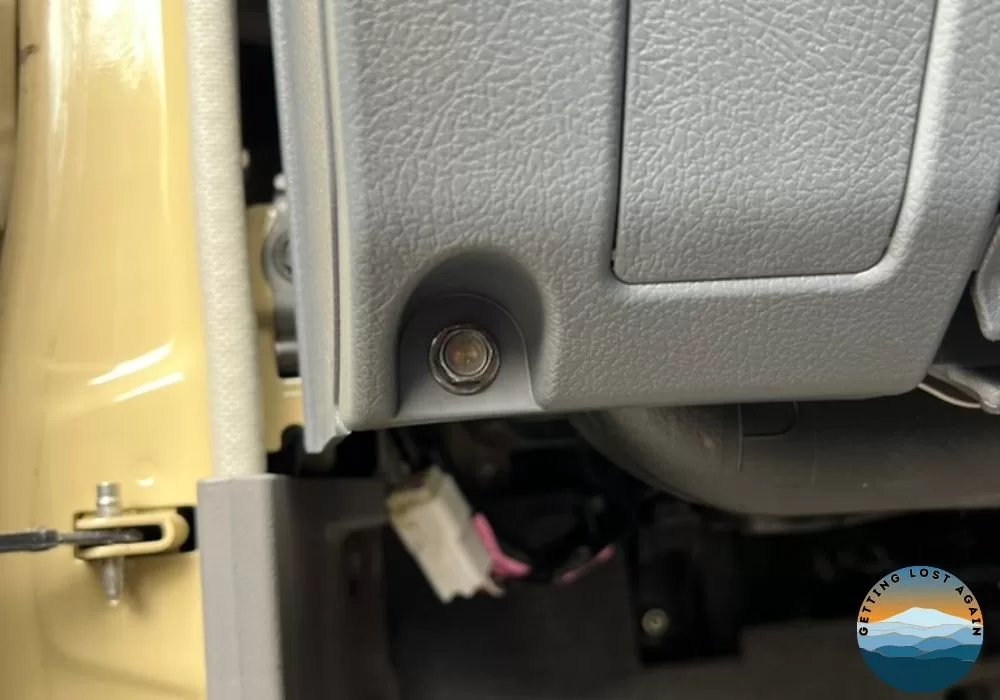
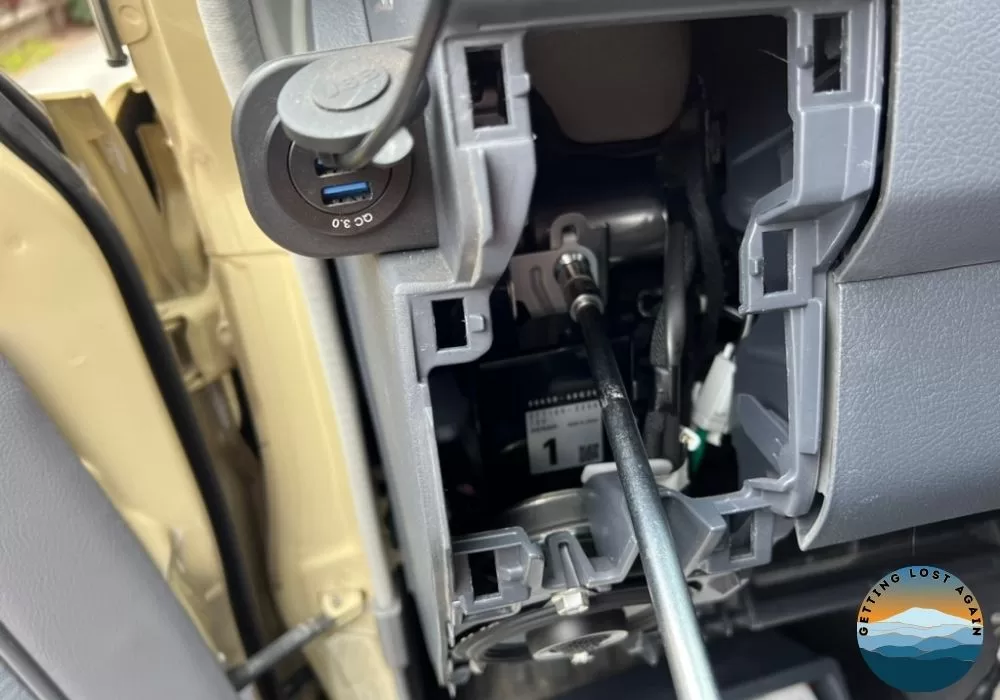
Step 6 – Loosen 10mm AC Amplifier Securing Nut
Using the 10mm socket. Loosen and remove the aircon controller (amplifier) 10mm securing nut.
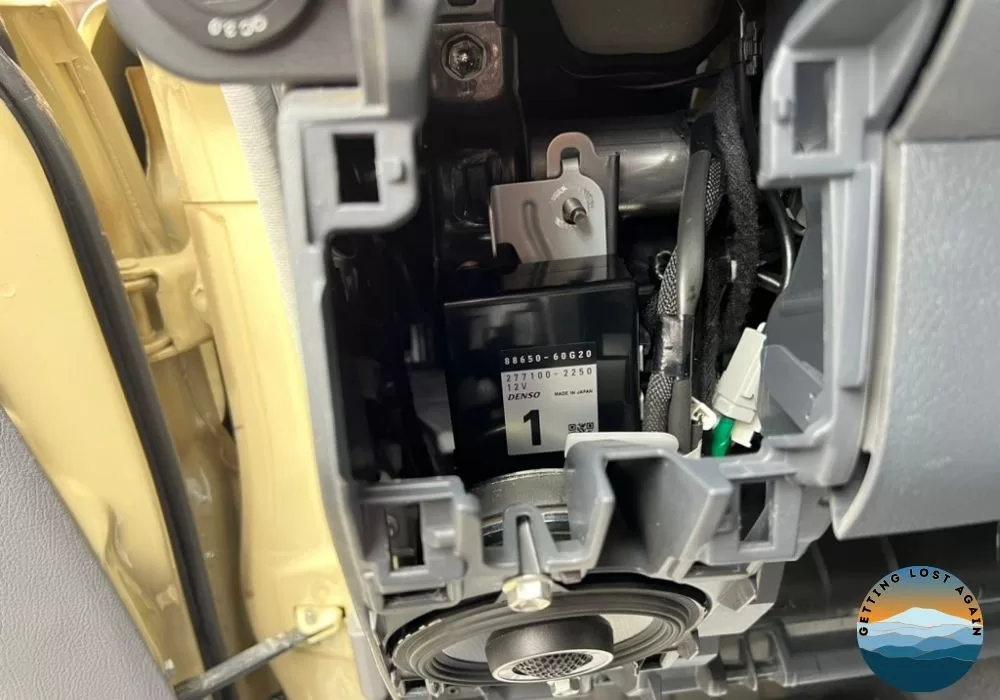
Step 7 – AC Amplifier Securing Nut Removed
Remove the nut and the controller housing is held in place by the tab.
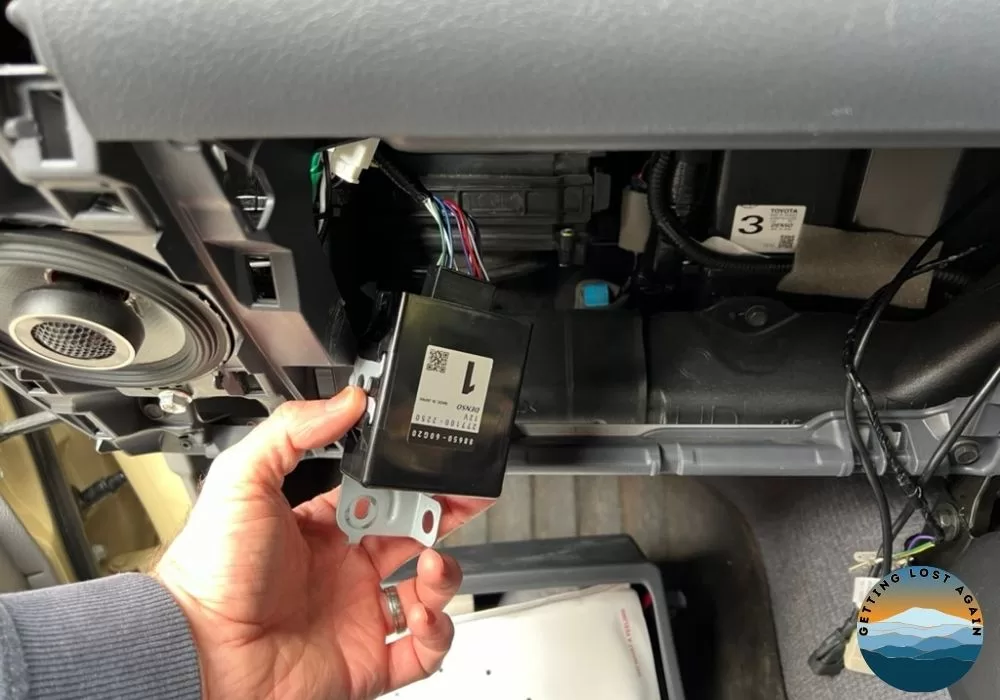
Step 8 – Removed AC Amplifier via Glove Box Cavity and Disconnect
Remove the controller via the glove box cavity, so that access to the vehicle plug is easier.
Press the plug retaining tab inwards and grip the plug at the sides to release and remove the plug.
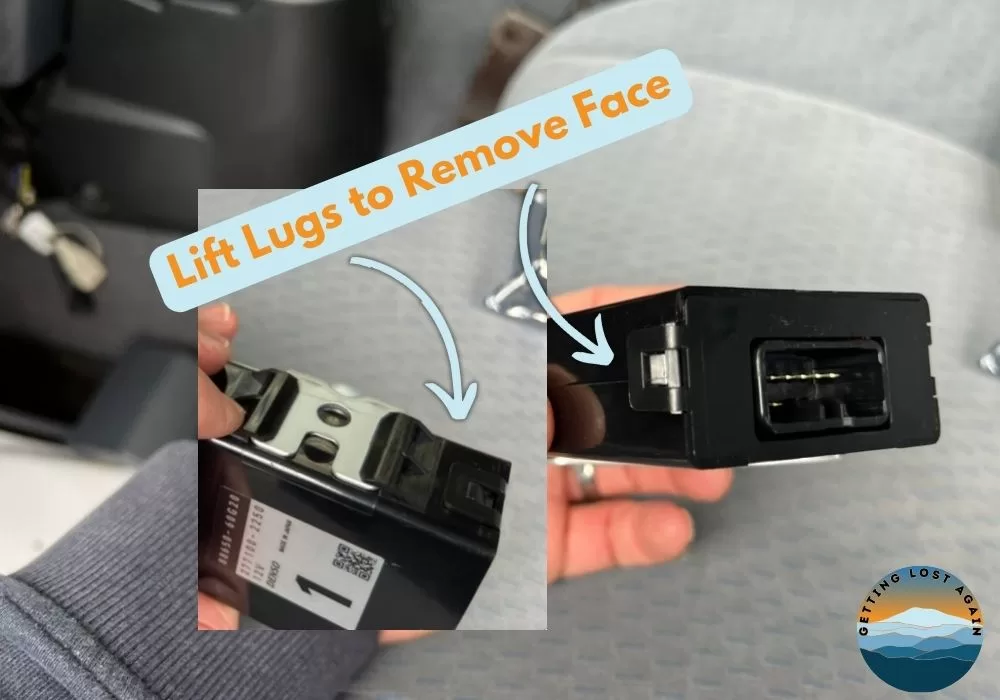
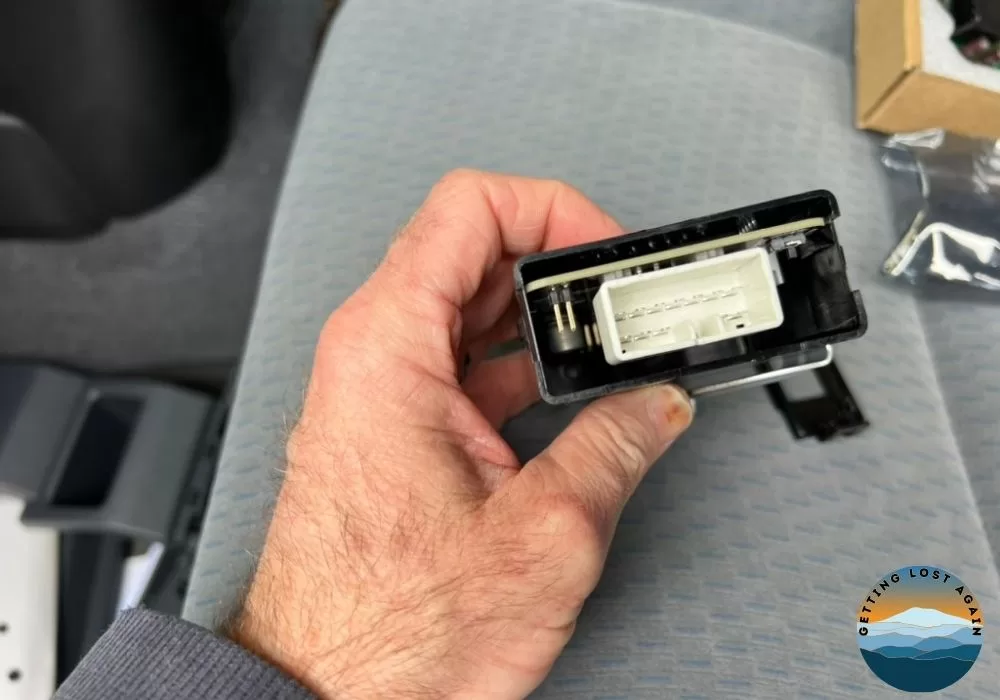
Step 9 – Removed AC Amplifier Cover
Remove the front cover of the controller housing by lifting the tabs on the case.
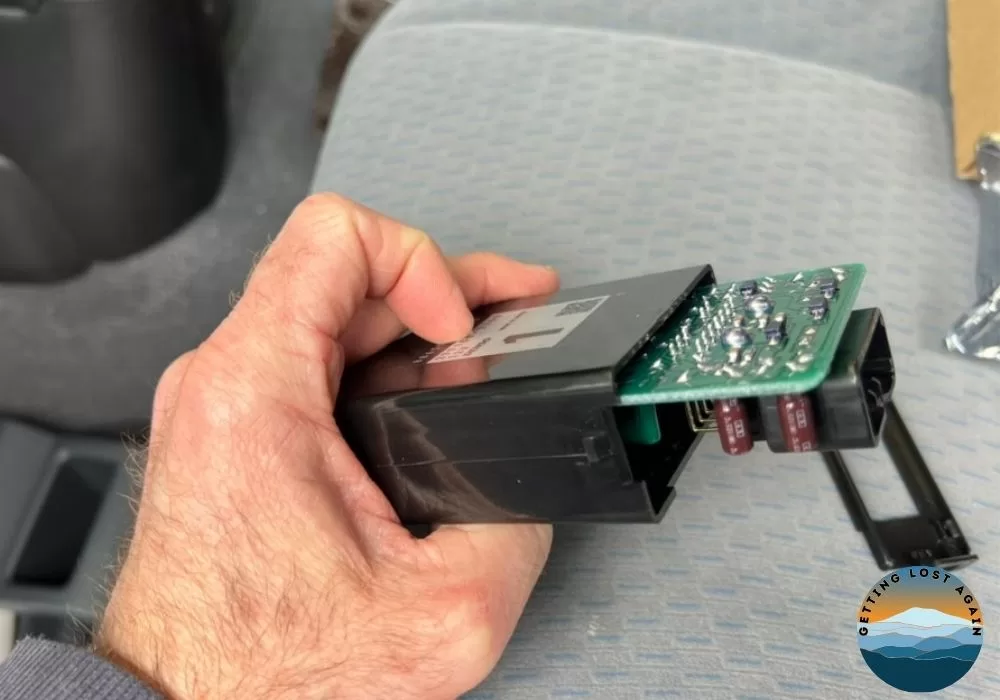
Step 10 – Removed OEM (88650-60G20) AC Amplifier PCB
Remove the OEM AC controller board.
Note: this can be tricky because the old board can be stuck in there, if that is the case flex the black housing to “crack” the stickiness!
Step 11 – Insert Freezebrain AC Amplifier PCB
Insert the Freezebrain PCB into the OEM PCB housing. Make sure you locate the PCB into the slots, which will hold the PCB in place correctly for the front cover to sit correctly.
Step 12 – Replace AC Controller Case Cover
Replace the AC Controller plastic cover. Ensure the tabs click into place.

Step 13 – Reconnect AC Amplifier to Vehicle Connector
Reconnect the vehicle plug and replace the controller back in the original position.
Step 14 – Resecure Amplifier Securing Nut
Resecure the 10mm retaining nut.
Step 15 – Replace Trim Panels and Glove Box
Replace the upper trim panel and the lower speaker panel, then replace the 10mm screw. Lastly, reinsert the glovebox.
Note: Don’t over-tighten the screw, you will risk stripping the plastic insert.
Test Your Vehicle
Once everything is back in place start up the vehicle and test the aircon. Check that there are no fault indicators on the dash. I highly recommend that you take a jacket, because you will quickly freeze your arse off!
We’ll post a longer-term test in the future after our next trip.
Follow our Troopy Build Series in almost “real time” over on Instagram.

Dan’s a windsurfing, adventure-seeking nomad with a passion for exploring the globe overland and an Engineer. Having grown up in the Middle East, he brings a unique perspective to Getting Lost Again, sharing his love for discovering hidden gems and embracing the unexpected. When he’s not on the road, he finds inspiration in windsurfing and other creative pursuits – and is equally at home under a vehicle solving problems as he is exploring a new place.